📑 Table of Contents (13 sections) — Tap to expand
⚡ Quick Takeaway (Position-0 Summary)
Standard gypsum board false ceilings cost ₹95–₹145/sq.ft for basic framing and sheet installation, while intricate POP cove designs run ₹120–₹180/sq.ft. Moisture-prone bathrooms and balconies should utilize PVC panels (₹110–₹160/sq.ft). Always budget an extra 40–50% for electrical point creation, concealed LED cove strips, COB spotlights, and ceiling primer/emulsion painting.
⚠️ Critical Safety Warnings & Precautions
Ceiling fans, chandeliers, and heavy hanging swing hooks must NEVER be anchored to gypsum boards or GI channel grids. They must be fastened directly into the parent RCC slab with industrial anchor expansion bolts through pre-marked trap openings.
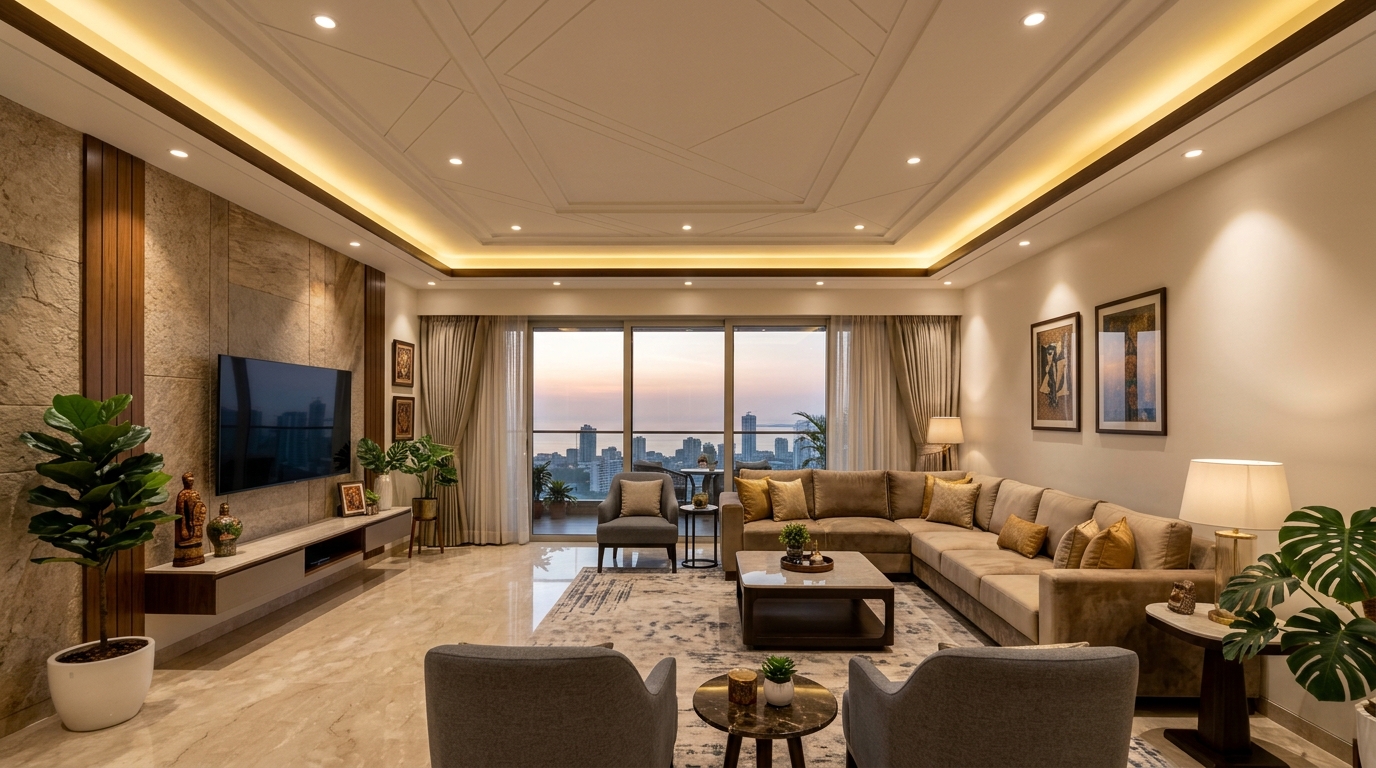
A false ceiling can tidy a room, conceal services and give lighting a planned position. It can also make a room feel lower than expected if the design is chosen from a photograph without measuring the space.
Before comparing a POP quote with a gypsum quote, decide what the ceiling needs to do. A simple border for a few lights is a different job from a full ceiling with several levels, concealed fittings and access panels.
This guide explains how to compare materials and installation scope for homes across India. It also covers the details that should be settled before the frame goes up.
Comparing the main ceiling materials
A ceiling’s performance depends on the complete assembly, including framing, boards or panels, fixing details and finishing. Choosing a familiar brand name for the visible surface is only one part of that decision.
| Material or system | A typical reason to consider it | Important detail to confirm |
|---|---|---|
| Gypsum board ceiling | Flat surfaces and planned lighting layouts | Board type, framing specification and joint treatment |
| POP work | Moulded details and shaped decorative work | Supporting system, workmanship and drying requirements |
| PVC panel ceiling | Panelled finishes and selected humid interiors | Product suitability, heat limits and complete fire-performance information |
| A limited border or ceiling feature | Concealing a small service zone or adding selected lights | Whether a full-room ceiling is necessary |
Gyproc supplies different plasterboard types for different performance requirements, including moisture and fire resistance. That does not make every board suitable for every wet location. Specify the actual product and the complete tested or approved system where those properties matter. [1]
For PVC, request the manufacturer’s technical information rather than accepting “waterproof” or “fireproof” as a complete specification. A water-resistant panel cannot fix a leak above it, and fire behaviour depends on the product and installation.
For all three options, ask how the ceiling will be supported, finished and accessed for repairs. Avoid fixing a fan or heavy decorative fitting to a board or panel alone. The installer must provide the appropriate independent or engineered support.
Understanding the complete cost
An online square-foot price can omit finishing, lights, wiring or difficult site access. Livspace’s false-ceiling guide separates costs by material and design, which is a useful starting point for comparison, but a site quotation still needs the full scope. [2]
As a published reference, NoBroker’s interior rate sheet lists gypsum false ceilings at ₹70–120 per sq. ft. and POP false ceilings at ₹90–150 per sq. ft., with the stated inclusions. These are provider examples, not a quote for your design or a guarantee of local rates. [4]
Ask what the quoted rate includes: framing, hangers, boards or panels, trims, joint treatment, paint preparation, painting and waste removal. Confirm the treatment of stepped edges, vertical faces, curved sections and small rooms.
Lighting is often a separate budget. “Light points included” may cover wiring or cut-outs without including the fittings themselves.
Here is a fictional example for a 120 sq. ft. room. It is a budgeting illustration, not a market rate.
| Work item | Illustrative calculation |
|---|---|
| Agreed ceiling system and installation | 120 sq. ft. × ₹110 = ₹13,200 |
| Surface finishing and painting | ₹3,600 |
| Electrical point alterations | ₹3,000 |
| Selected light fittings | ₹4,000 |
| Access panel and other agreed details | ₹1,200 |
| Subtotal before applicable taxes and other charges | ₹25,000 |
A price that initially appears to be ₹13,200 can therefore describe only part of the finished project. Compare totals with equal inclusions.
Local labour, room access, the amount of detailed work and the condition of the structure can affect the final quote. Do not assume the same area in every Indian city will cost the same.
Measuring the room and planning the height
Measure the existing floor-to-ceiling height and mark the proposed finished ceiling level on the walls. Stand in the room and look at that line before approving the design.
Check door tops, windows, curtain arrangements, overhead cupboards and air-conditioning equipment. A drawing should show how the ceiling meets each of them.
Ask why the proposed drop is needed. A simple light layout may need less space than a design with ducts and several layers. The installer should work from the equipment and system requirements rather than a standard drop used everywhere.
For a compact room, consider doing less. A narrow feature or a plain ceiling with surface-mounted lighting may meet the need while keeping more height.
The best measurement is a complete dimensioned layout. It should show ceiling levels, lighting positions, access points and the way the edge detail is charged.
Preparing for installation
Resolve the condition above the ceiling
Look for seepage, loose plaster and damaged services. Repair the source before covering the area.
Photograph the visible services and note where valves, junctions or equipment need future access. A concealed leak becomes harder to find once the ceiling is finished.
Coordinate the light fittings
Choose the fitting models before the cut-outs are made. Check their installation depth, heat clearances and whether the driver or other components need access.
Discuss the appearance with the lights switched on, not just the drawing. Several closely spaced bright downlights can be uncomfortable even when the ceiling looks attractive in a photograph.
Confirm the materials
Ask for the board or panel identification, framing specification and finishing products on the order. Check delivered materials before they are installed.
For claims about acoustics, fire or moisture resistance, ask what the complete assembly achieves. A single component does not establish the performance of the entire ceiling.
Following the work sequence
Structured Step-by-Step Execution Guide
- Step 1 - Approve a coordinated drawing: Agree the finished height, material, edge details, light positions and access panels. Mark any heavy fitting that needs separate support.
- Step 2 - Protect the room: Remove or cover furniture and protect floors. Arrange safe access for the installation team. Ceiling work involves overhead tasks and is not a suitable first DIY project.
- Step 3 - Complete repairs and service preparation: Resolve leaks and required repairs. Have the electrical work planned and carried out by a qualified professional before the relevant areas are closed.
- Step 4 - Inspect the supporting system: Ask the installer to show the agreed framing and fixing arrangement before the visible finish hides it. Use the system manufacturer’s requirements rather than improvised fixing details.
- Step 5 - Install and finish the surface: The method differs between gypsum, POP and panel systems. Joint treatment, drying and finishing should follow the selected products. Avoid rushing painting over material that is not ready.
- Step 6 - Complete electrical fittings and access details: Have the electrician fit and test the lights. Check that service access panels can be opened without damaging the finished ceiling.
- Step 7 - Inspect in daylight and under the room lights: Look along the surface from different positions. Check uneven joints, cracks, chipped edges and poorly positioned cut-outs. Record the snag list before settling the final balance.
Handover checklist
Before work:
Confirm ceiling height, approved drawings, material specifications, service access and the complete price.
Before closing the surface: Check required supports and service positions with the responsible trades.
At completion: Inspect finishes, lighting operation, access panels and clean-up. Keep invoices, product information and photographs of concealed routes.
Avoid drilling into a finished ceiling without checking what is above it. For additional fixtures, get the support arrangement assessed first.
Troubleshooting & Common Problems: Troubleshooting and maintenance
A crack appears along a joint
Ask the installer to investigate the joint treatment, framing or movement. Repeatedly covering the line with paint may hide the symptom briefly without resolving its cause.
A stain appears after rain
Investigate the water source above the ceiling. Keep people away from sagging or softened areas and arrange professional inspection.
The room feels darker after installation
Check light output, placement and the colours of the room. Additional ceiling layers do not necessarily improve illumination.
A driver or fitting fails but cannot be reached
This is an access-planning problem. Discuss access during design, especially where components will need replacement.
Frequently asked questions
Choosing the cheapest ceiling material
Compare the complete installed and finished project. A lower material rate may be outweighed by detailed labour, extra painting or additional fittings.
Using a false ceiling in a humid room
Select a system specifically suitable for the conditions and follow its ventilation and exposure requirements. Persistent dampness needs repair before any ceiling is fitted.
Keeping the existing fan
Confirm its mounting and the relationship between the new ceiling level, fan and room. Have the support assessed and retained or altered correctly.
Installing a ceiling in only part of a room
A limited feature can work well if it has a clear purpose. Check how it meets walls, lights and furniture rather than extending it simply to fill the room.
Wrapping up
Agree the height and the purpose first. Then compare complete systems with the same lighting, painting and access requirements.
A modest ceiling with good proportions and useful lighting can be a better fit for the room than an elaborate design that leaves little height or difficult maintenance.
Related Guides & Services on Carpenterwala:
Sources and product guidance
Sources checked on 23 October 2026. The budget table is illustrative; obtain a quote for the actual design and complete system.
- [1] Gyproc plasterboard types and performance information
- [2] Livspace false-ceiling cost and material guide
- [3] Gyproc residential ceiling and drywall systems
- [4] NoBroker published interior work rates and inclusions

Rajesh Sharma
Verified SpecialistMaster Carpenter & Woodwork Consultant
Over 15 years of custom woodworking, furniture restoration, and modular interior fittings experience in Bangalore.
⚖️ DIY vs. Hiring a Professional: When to Call an Expert
✓ Safe to DIY
- Minor screw tightening or loose hinge lubrication
- Basic component replacement with matching dimensions
- Routine surface touch-ups and non-structural adjustments
⚠️ Hire a Verified Pro
- Structural woodwork warping, masonry drilling, or rotted frames
- High electrical voltages, MCB trips, or water line pipe bursts
- Multi-room installations requiring specialized power equipment
💬 Comments (0)