📑 Table of Contents (20 sections) — Tap to expand
⚡ Quick Takeaway (Position-0 Summary)
Complete electrical wiring in India typically costs ₹650–₹1,200 per point (labour + conduit + FR/FRLS copper wire + modular switch/plate) or ₹110–₹180/sq.ft of built-up area. For a standard 2BHK/3BHK, allocate ₹45,000–₹1,15,000. Never compromise on fire-retardant FRLS copper cables (Finolex/Polycab/Havells), dedicated 30mA RCCB/ELCB shock protection, and minimum 2.5 sq.mm dedicated lines for ACs, geysers, and kitchen appliances.
⚠️ Critical Safety Warnings & Precautions
Never perform concealed electrical chasing, wire pulling, or distribution box work while the main meter line is energized. Ensure a certified licensed electrician checks insulation resistance with a 500V Megger tester and verifies earth loop impedance (<1 Ohm) before energizing.
A new air conditioner, an induction hob and a second work desk can change what a home needs from its wiring. Yet a quote based only on the number of rooms may tell you very little about the circuits required.
Rewiring an occupied home also includes work that a new-build quote may leave out: opening access, protecting furniture, repairing walls and coordinating power shut-offs.
This guide explains how to compare the scope and cost with a qualified electrician. It is a planning guide for homeowners; circuit design, wiring, connection and electrical testing belong with the appropriate professional.
Deciding what work is needed
Separate a faulty accessory from a wider installation problem. One damaged switch does not automatically mean the whole home needs rewiring, while repeated symptoms should not be dismissed as a minor inconvenience.
Ask for an inspection if there are recurring trips, burning smells, scorch marks, damaged insulation or unreliable earthing. Stop using affected equipment or circuits and arrange qualified help rather than repeatedly resetting or bypassing a protective device.
The electrician should assess the existing wiring, available routes, loads, protective devices and earthing before recommending the work.
A renovation may involve new points on suitable existing circuits, partial rewiring, a distribution-board upgrade or a complete installation. These are different scopes and should be described separately.
Building access, meter and supply requirements, and local rules may also affect the job. Confirm responsibilities with the relevant professionals and building management before work starts.
Understanding points and area rates
A “point” is a quotation unit, not a universal description. Ask the contractor to define it.
Does a light point include the switch, wiring, conduit and fitting? Is a socket beside that switch counted separately? What route length is included? Are appliance circuits priced differently?
| Quotation basis | Why it is used | What to ask |
|---|---|---|
| Per point | Comparing a defined set of outlets or lights | Exact inclusions, route length and point definition |
| Per square foot | Early budgeting for a defined property and scope | Which area is measured and what the rate covers |
| Per circuit | Pricing a particular circuit or appliance requirement | Design, route, protection and termination inclusions |
| Itemised package | Comparing the complete installation | Quantities, material specifications and exclusions |
If one contractor counts 30 points and another counts 45, compare the point schedule before comparing their rates.
An area rate should not be used to choose wire size or breaker rating. Those are design decisions based on the actual installation and applicable requirements.
Building an itemised wiring budget
Ask for materials, labour, protective devices, earthing work, making good and testing to be visible in the quote.
For a published reference, NoBroker’s interior rate sheet gives electrical work at ₹50–120 per sq. ft., combining its stated labour and material ranges. Treat that as a provider’s broad benchmark; the actual point schedule, existing condition and inclusions still need a site quote. [5]
The following is a fictional example showing how a small project might be itemised. The figures are not market rates, and the point count is not a wiring design.
| Work item | Illustrative allowance |
|---|---|
| Labour for 28 defined points | 28 × ₹450 = ₹12,600 |
| Agreed wiring, conduit and accessories | ₹22,000 |
| Distribution-board and protection allowance | ₹9,000 |
| Identified earthing work allowance | ₹6,500 |
| Wall repairs and making good | ₹8,000 |
| Testing and documentation | ₹3,000 |
| Subtotal before applicable taxes and other charges | ₹61,100 |
Heavy-appliance circuits, a supply upgrade or extensive concealed damage may need separate assessment. Remove or change allowances that do not apply to your installation.
Ask whether the switches and socket faceplates are included. Decorative ranges can change the total without changing the underlying safety design.
For an occupied home, discuss furniture movement, work hours, dust and temporary power arrangements. A low installation quote may leave you with a separate wall-repair bill.
Comparing materials and protective devices
Record exact material specifications
The quote should identify cable and wire products, conductors, insulation type, conduit, accessories and protective devices. Let the electrician determine suitable sizes and ratings for the design.
Finolex, for example, offers house-wire products with specified insulation and flame-retardant characteristics. Read the actual product description rather than treating a brand name or “fireproof wire” claim as a complete specification. Flame retardance does not make an installation incapable of causing a fire. [1]
Ask how the delivered products will be verified and invoiced. Avoid approving unrecorded substitutions simply because the outer colour looks similar.
Understand the purpose of the protection
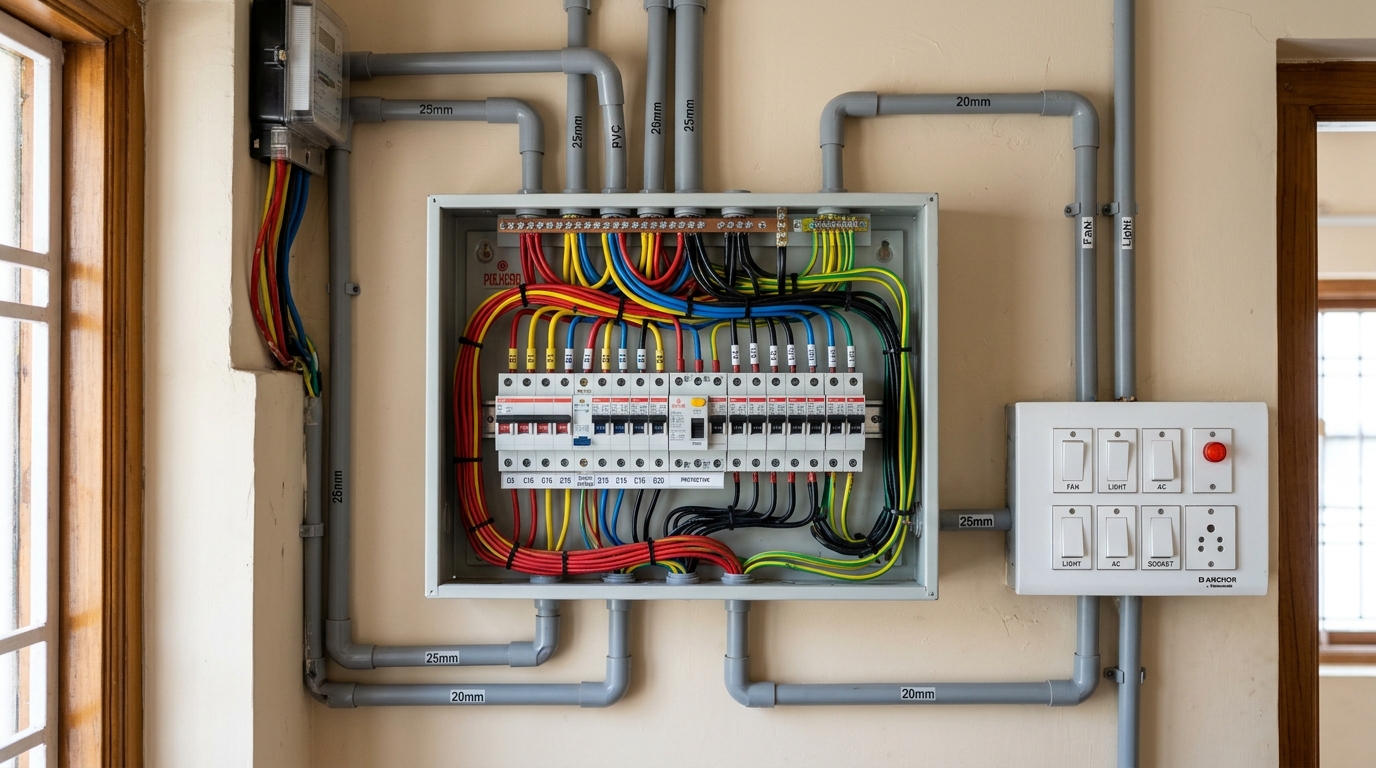
Schneider Electric distinguishes overcurrent protection from residual-current protection. An MCB addresses overload and short-circuit conditions; an RCCB addresses residual-current imbalance and does not by itself provide overload protection. An RCBO combines the relevant overcurrent and residual-current functions. [2][3]
The appropriate devices and their coordination must be selected for the installation. Do not choose a bigger breaker simply to stop tripping.
Earthing remains part of the installation design and verification. A new board with modern-looking switches does not demonstrate that the rest of the system has been checked.
Keep future additions specific
Tell the electrician about planned appliances and likely locations. A future work desk may need useful socket positions; a future large appliance may need a separately assessed circuit.
Leave space and provision according to the professional design. Avoid the assumption that spare conduits or an empty board position alone make any future load safe.
Planning the work with your electrician
Structured Step-by-Step Execution Guide
- Step 1 - Prepare a room and appliance list: Mark the current and proposed furniture. List appliances you use and expect to add, including their model information where available.
Note inconvenient extension leads and places where existing sockets are inaccessible behind furniture.
Structured Step-by-Step Execution Guide
- Step 2 - Have the installation assessed: Ask the electrician to explain which parts can remain and which need replacement. Request the basis for the recommendation and the testing or inspection it relies on.
Keep any existing drawings and previous installation records available.
Structured Step-by-Step Execution Guide
- Step 3 - Approve a point and circuit schedule: The agreed schedule should identify outlet and fitting positions and the professional design requirements. Check room usability without trying to replace the electrician’s calculations.
Confirm that switch positions, door swings, cupboards and countertop heights have been coordinated.
Structured Step-by-Step Execution Guide
- Step 4 - Compare complete written quotes: Use the same schedule for each bidder. Record product specifications, labour, repair work, testing and responsibility for approvals or supply-related changes.
Agree how additional concealed damage or scope changes will be priced.
Structured Step-by-Step Execution Guide
- Step 5 - Plan isolation and access: The electrician should arrange safe isolation and controlled work. Discuss when rooms will be without power and how essential household needs will be managed.
Keep children and other occupants out of the work area. Do not open boards or fittings to inspect energised work yourself.
Structured Step-by-Step Execution Guide
- Step 6 - Record routes before walls are closed: Ask for photographs and measurements from fixed reference points. Confirm that the required professional checks have been completed before concealing the work.
Coordinate wall repairs and painting after the electrical stages that need access are finished.
Structured Step-by-Step Execution Guide
- Step 7 - Collect test results and a clear handover: Ask the electrician for the relevant test records, including checks such as protective-conductor continuity, insulation resistance, polarity, earthing and residual-current-device operation where applicable to the installation.
The tests and acceptance criteria must follow the design and applicable requirements. A homeowner pressing a few switches is not a substitute for electrical verification. [4]
Handover checklist
Before work:
Confirm inspection findings, drawings, point definitions, material specifications and the complete quote.
Before closing routes: Retain photographs and the required professional inspection records.
At completion: Collect circuit labels, test documentation, invoices and product manuals. Ask the electrician to explain normal operation and what to do if a device trips.
Keep the final records where a future electrician can find them. Labels should make sense to the household, not only to the installer.
Troubleshooting & Common Problems: Common quotation problems
The cheaper quote counts fewer points
Compare the schedule and inclusions. A fan regulator, socket or appliance circuit may have been treated differently.
Rewiring is priced without wall repair
Ask whether chasing, plaster repairs, debris removal and painting are included or separate.
The contractor proposes a larger breaker to stop trips
Ask for a proper diagnosis and a design check. A protective device should not be uprated as a shortcut around an unresolved fault or overload.
Everything is called a complete electrical package
Request quantities, product models, testing and exclusions. A package name alone is difficult to compare or enforce.
Frequently asked questions
Rewiring because a home is a certain age
Age can prompt inspection, but condition, use, alterations and test results should inform the decision. Avoid choosing a scope from age alone.
Reusing existing conduits
The electrician should assess their condition, route and suitability. Reuse can reduce disruption when appropriate, but it should not be assumed before inspection.
Buying the materials yourself
Use the electrician’s final specification and agree responsibility for compatibility, quantities, shortages and warranties. Do not substitute ratings based on a shop recommendation alone.
Completing electrical work before painting
Finish work that needs access to walls and ceilings first. Coordinate final accessories and protective covering with the painter and electrician.
Wrapping up
Compare the point schedule, design, materials and test records alongside the price. That makes it easier to see whether two contractors are quoting for the same work.
A clear handover is part of the project. It should leave you with a usable installation and records that help the next person maintain it properly.
Related Guides & Services on Carpenterwala:
Sources and product guidance
Sources checked on 23 October 2026. The sample budget illustrates quotation structure and does not specify a circuit design.
- [1] Finolex house-wire product information
- [2] Schneider Electric guide to MCBs RCCBs and isolators
- [3] Schneider Electric comparison of circuit-protection devices
- [4] IET technical background on initial verification and testing
- [5] NoBroker published electrical work rate example

Vikram Rao
Verified SpecialistCertified Senior Electrical Systems Supervisor
Licensed electrical inspector specializing in residential safety grids, MCB/ELCB diagnostics, and smart installations.
⚖️ DIY vs. Hiring a Professional: When to Call an Expert
✓ Safe to DIY
- Minor screw tightening or loose hinge lubrication
- Basic component replacement with matching dimensions
- Routine surface touch-ups and non-structural adjustments
⚠️ Hire a Verified Pro
- Structural woodwork warping, masonry drilling, or rotted frames
- High electrical voltages, MCB trips, or water line pipe bursts
- Multi-room installations requiring specialized power equipment
💬 Comments (0)