
📑 Table of Contents (8 sections) — Tap to expand
⚡ Quick Takeaway (Position-0 Summary)
To fix a sagging door that won't latch, you need to realign the strike plate or shim the top hinge so the latch bolt meets the strike plate hole again. In most Indian homes this happens because the door has dropped slightly on its hinges over time, throwing off the alignment by just a few millimeters — a cardboard or matchbox shim behind the top hinge usually solves it without removing the door.
Why Your Door Won't Latch: Easy Fixes for a Misaligned, Sagging Door
You push the door shut, hear it click against the frame, but the latch just... doesn't catch. You have to lift the handle side slightly and slam it a bit harder than you'd like. This is one of the most common carpentry complaints in Indian homes, and it's almost never the lock's fault.
Here's what's actually happening: your door is sagging. Over years of use — especially with heavier solid wood doors common in Indian homes — the hinges on the frame side (chaukhat) take on stress and the screws holding them slowly work loose in the wood. Add monsoon humidity swelling the door frame and dry summer heat shrinking it back, and the door literally starts drooping on its hinges by a few millimeters. That's enough to throw the latch bolt out of alignment with the strike plate hole in the frame.
Builder-grade chaukhats in India are frequently made of lower-density wood that doesn't hold screw threads as well as seasoned hardwood — which is exactly why this sagging problem shows up faster here than you'd expect from a "new" door.
The good news: this is a 10-15 minute fix in almost every case, and you don't need to remove the door or call a carpenter for it.
What You Will Need
Gather these basic household tools and everyday consumable items before starting:
- Screwdriver set (Phillips / star head matching your hinge screws)
- A pencil for marking strike alignment
- A small wood chisel (only needed if deepening the mortise)
- Light hammer
- Flashlight or smartphone torch
- Cardboard shim material (cut-up matchbox cover or cereal box)
- Wood filler or Fevicol MR + wooden toothpicks (for stripped screw holes)
- 2-3 spare screws (slightly longer than originals if holes are loose)
- WD-40 spray (optional, for stiff or squeaking hinges)
⚠️ Critical Safety Warnings
Read this before you start:
- Never work on a heavy load-bearing door alone if it ever needs to come fully off the hinges. Solid teak or sal wood doors weigh upwards of 30-45 kg; a falling door can shatter ceramic floor tiles or cause severe foot injuries. While this shim technique keeps the door in place, keep a second person nearby for stability if needed.
- Keep small hardware away from children: Loose screws, hinge pins, and toothpicks pose dangerous choking hazards. Store removed screws immediately in a magnetic tray or small cup.
- Inspect for structural rot or dampness: If the wooden chaukhat feels spongy, moist, or darkened near the hinge mortise, stop immediately. Water seepage from bathroom walls or exterior balconies weakens wood fibers, and shims will not hold in rotting timber. This requires frame restoration first.
- Use a sturdy step stool: Avoid balancing precariously on plastic chairs or unsteady stools to reach top hinges. Use a verified step ladder.
Step-by-Step Practical Execution Guide
-
Step 1: Confirm It's a Sag Issue, Not a Lock Issue
Close the door slowly and watch exactly where the latch bolt meets the frame. If the bolt is hitting above or below the strike plate hole (not left-right), that confirms sagging — the door has physically dropped. If it's hitting left-right off-center, that's usually a different fix (strike plate repositioning, not shimming).
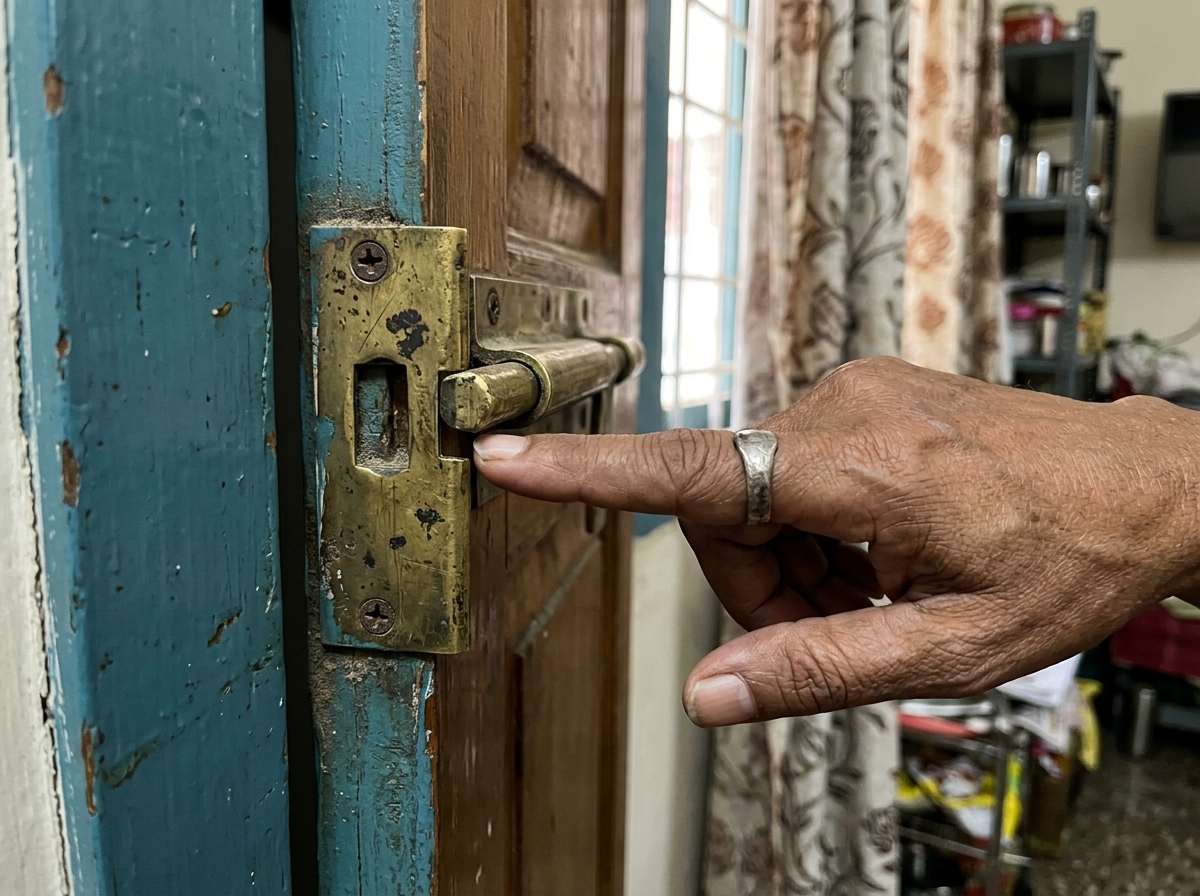
Step 1: Pointing at the latch bolt hitting below the strike plate recess due to hinge drop. -
Step 2: Identify Which Hinge Needs the Shim
Understanding which hinge to adjust is the golden rule of door realignment:
• If the latch bolt is sitting too low against the strike plate (the door has dropped at the handle side), you need to shim the top hinge. Shimming the top hinge tilts the top of the door slightly inward and swings the outer handle corner upward.
• If the bolt is sitting too high, shim the bottom hinge instead.
This is the single most confusing part for beginners, so take a moment and actually watch the door swing shut 2-3 times before deciding.
-
Step 3: Remove the Relevant Hinge Leaf From the Frame Side
Unscrew just the frame-side leaf of the identified hinge (not the door-side leaf) — usually 2-3 screws. You don't need to take the door off; the hinge pin stays connected, and the door will simply hang loosely from its other hinge(s) for a moment. Have your other hand ready to support the door if it's the only functioning hinge left temporarily.
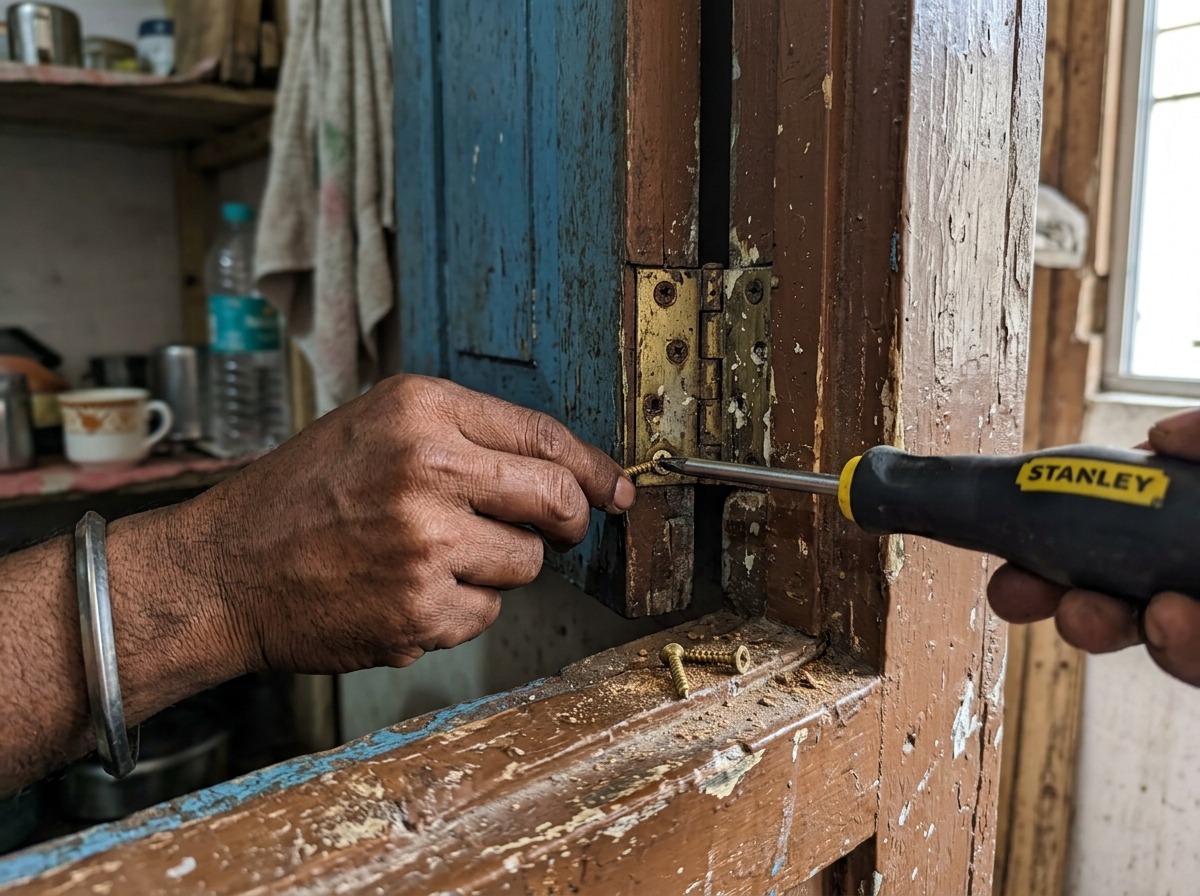
Step 3: Backing out the screws from the chaukhat frame leaf while keeping the door supported. -
Step 4: Cut Your Shim to Size
Cut a piece of cardboard (or a proper wooden shim) roughly to the shape of the hinge leaf's recessed mortise in the frame — the small rectangular notch the hinge sits in. It doesn't need to be perfect; even a rough rectangle that covers most of the recess works.
-
Step 5: Insert the Shim Behind the Hinge
Place the cardboard shim into the hinge mortise (the recessed cutout in the frame), then reposition the hinge leaf on top of it and screw it back in through the same holes.
What this does: The shim pushes the entire hinge slightly outward from the frame, which tilts the door just enough at that point to correct the sag and bring the latch back in line with the strike plate.

Step 5: Placing a matchbox cardboard shim into the frame mortise before re-tightening. -
Step 6: Test and Adjust
Close the door and check the latch. If it's still not quite catching, you likely need a slightly thicker shim (double up the cardboard) — or if it's now overcorrected and rubbing on the other side, remove one layer. This is genuinely a trial-and-error step; most people get it right within 2 attempts.
-
Step 7: If Screws Won't Grip (Stripped Holes)
If, while removing or reinstalling the hinge screws, you find they're spinning freely without biting into the wood, the screw hole is stripped. Fix this with the classic toothpick-and-Fevicol trick: dip 2-3 wooden toothpicks in Fevicol, jam them into the stripped hole, snap off the excess, let it dry 30-45 minutes, then re-drive the original screw into the now-solid hole.

Step 7: The carpenter's toothpick-and-Fevicol trick to restore solid bite to stripped screw holes.
🛠️ Pro-Tips From the Field
- Matchbox covers are the gold standard: Old-school carpenters use a matchbox cover, not random cardboard — it's the perfect 0.5mm thickness for most shim jobs on standard Indian door hinges, and it's always lying around the house. Start with one layer before doubling up.
- Handling three-hinge doors: If the door sags at multiple hinges simultaneously (common on older, heavier solid-wood doors), shim the middle hinge slightly less than the top and bottom — over-shimming the middle hinge can actually bow the door and cause it to bind against the frame on one side.
- Permanent wooden veneer upgrade: For a permanent lifetime fix, once you know exactly how much shimming works, replace the temporary cardboard with a thin sliver of actual teak wood veneer or a brass hinge spacer plate — cardboard can compress slightly over several years of frequent slamming.
Troubleshooting Common Mistakes
Encountered an unexpected issue after shimming? Here are the three most frequent mistakes and their immediate solutions:
- "I shimmed the top hinge but now the door rubs against the frame at the bottom." You've over-corrected. Remove one layer of shim material and retest — this is normal trial-and-error, not a failed job.
- "The latch is aligned now but the door doesn't close flush anymore — there's a visible gap." You likely shimmed a hinge that didn't actually need it. Undo that shim, and re-examine Step 2 more carefully — watch exactly where the bolt is missing the strike plate before choosing which hinge to shim.
- "I keep stripping the screw the moment I try to tighten it." Stop immediately — don't keep forcing it, as you'll enlarge the hole further. Use the toothpick-and-Fevicol method from Step 7, let it cure fully, and only then re-drive the screw.
Conclusion & Related Tasks
A sagging door is one of those problems that sounds like it needs an expensive carpenter visit, but is genuinely a 15-minute job once you understand which hinge to shim. Keep a few matchboxes handy — you'll likely need this trick again on other doors in the house eventually.
Related Reads & Handyman Resources on Carpenterwala
- How to repair a stripped wood screw hole in a door hinge (Browse all How-To Guides)
- How to fix squeaky, misaligned, or loose door hinges (Professional Carpentry Services)
- How to square up a warped cabinet door that won't close flush (Book Door Realignment Specialist)

Rajesh Sharma
Verified SpecialistMaster Carpenter & Woodwork Consultant
Over 15 years of custom woodworking, furniture restoration, and modular interior fittings experience in Bangalore.
⚖️ DIY vs. Hiring a Professional: When to Call an Expert
✓ Safe to DIY
- Minor screw tightening or loose hinge lubrication
- Basic component replacement with matching dimensions
- Routine surface touch-ups and non-structural adjustments
⚠️ Hire a Verified Pro
- Structural woodwork warping, masonry drilling, or rotted frames
- High electrical voltages, MCB trips, or water line pipe bursts
- Multi-room installations requiring specialized power equipment
💬 Comments (0)