📑 Table of Contents (7 sections) — Tap to expand
⚡ Quick Takeaway (Position-0 Summary)
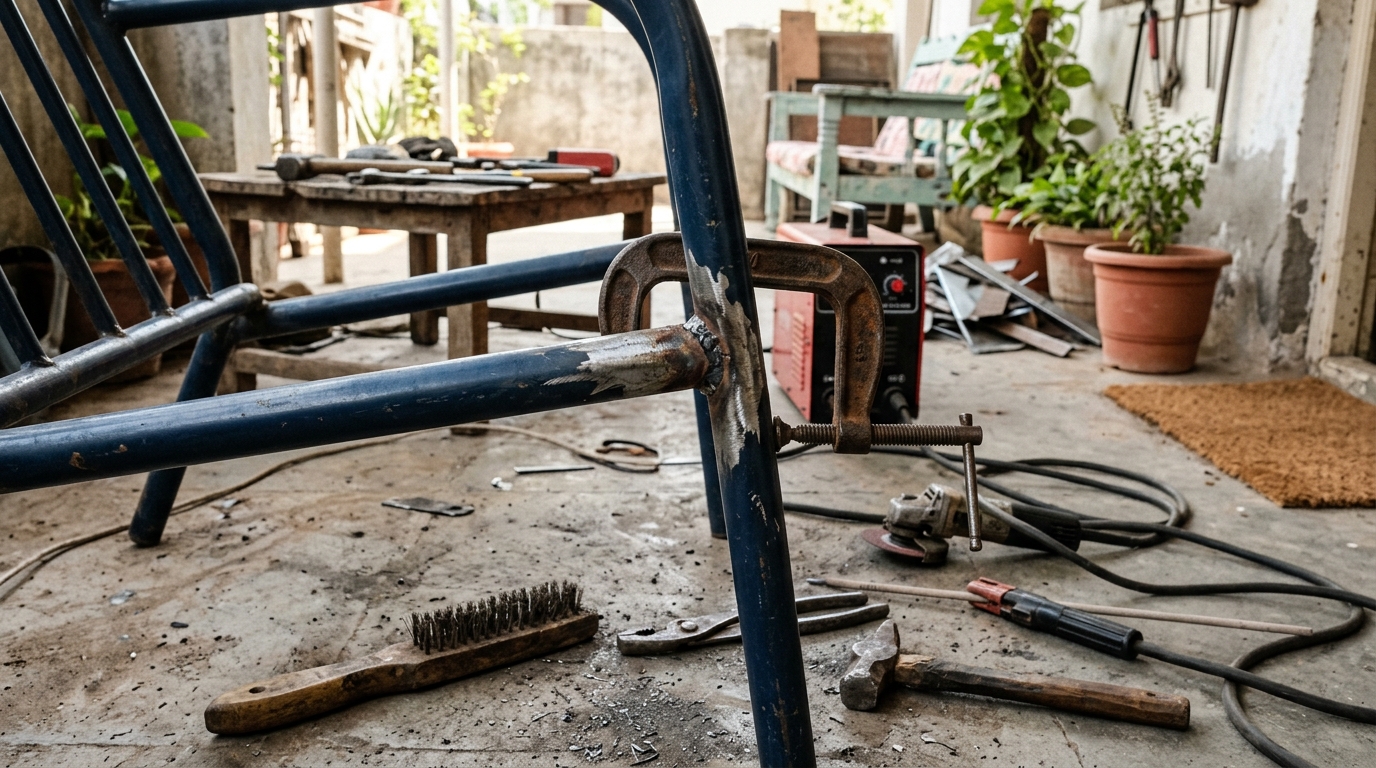
To repair a broken weld on a metal lawn chair, clean both broken surfaces to bare metal, realign the pieces precisely using clamps, then either re-weld the joint with an inverter welder for a permanent structural fix, or apply a structural metal epoxy as a no-weld alternative for lighter-duty seating repairs, before sanding smooth and repainting.
Why Outdoor Metal Chair Welds Fail Under Indian Conditions
That satisfying-looking metal garden or lawn chair that's suddenly wobbly, or worse, has a joint that's snapped clean through where a leg meets the seat frame or where two frame sections connect. Metal outdoor furniture takes a genuinely tough life in Indian conditions — constant sun exposure, monsoon rain, and repeated weight-bearing stress every time someone sits down, shifts position, or the chair gets dragged across a patio or balcony floor.
The welds holding these chairs together are the weakest structural point by design — a weld joint, even a well-made one, typically has different metallurgical properties than the surrounding base metal, and over years of repeated stress cycling (sitting down, standing up, weight shifts) combined with rust weakening the joint from moisture exposure, these connection points are exactly where failure tends to concentrate. Cheaper mass-produced garden furniture, common and affordable across Indian markets, often has thinner-gauge metal and less robust original welds than premium furniture, making this an especially common repair need.
This guide covers both a proper re-weld (the stronger, more permanent option if you have or can access welding equipment) and a no-weld epoxy alternative for lighter-use situations.
What You Will Need
Gather the following tools and repair supplies before tackling the broken joint:
- Budget Inverter Welder: With fine 1.6mm or 2.0mm mild steel electrodes (E6013) for thin tubular metal.
- Structural Metal Epoxy: High-tensile, two-part steel-reinforced epoxy putty or liquid resin (if opting for no-weld repair).
- Angle Grinder & Flap Disc: 4-inch grinder with 80-grit flap disc or wire cup wheel for rapid cleanup.
- Wire Scratch Brush & Emery Cloth: 80-grit and 120-grit emery sheets for hand-scouring crevices.
- C-Clamps or Locking Grip Pliers: To hold the fractured joint in exact geometric alignment.
- Personal Protective Equipment (PPE): Auto-darkening welding helmet (shade 9-11), leather welding gloves, and safety goggles.
- Anti-Rust Finish: Red oxide primer and weather-resistant exterior enamel paint matching the chair finish.
⚠️ Critical Safety Warnings
Read this before you start:
- Follow full welding safety practices: Always wear a proper welding helmet with the correct shade lens, leather gloves, and flame-retardant clothing in a well-ventilated outdoor work area.
- Beware of thin-gauge burn-through: Thin-gauge chair frame tubing melts through quickly if welding amperage is too high. Dial your inverter welder down (typically 40–60A) and test on scrap metal before striking an arc on the chair.
- Verify load ratings for epoxy repairs: If using structural epoxy instead of welding, confirm the product is rated for high dynamic weight. Standard household craft epoxies will shear under human body weight.
- Perform step-load testing before use: Never let anyone sit immediately on the repaired chair. Test gradually by leaning and applying hand pressure first after full curing or cooling.
- Respect complete cure and cooling cycles: A structural failure while someone is seated can cause painful injuries. Wait 24 hours for epoxy to cross-link or allow welds to cool naturally without quenching in water.
Step-by-Step Practical Execution Guide
Follow these 8 detailed steps to re-weld or chemically bond your metal lawn chair joint back to structural strength:
-
Step 1: Assess the Break and Choose Your Method
Examine the fractured joint carefully. Check if it is a clean snap that realigns flush or if the thin metal tubing has crumpled or torn away material. Choose between an electric re-weld (permanent, high-load capacity) or structural steel epoxy (fast, no electrical gear needed, ideal for lighter decorative chairs). -
Step 2: Clean Both Broken Surfaces to Bare Metal
Use a wire brush and 80-grit emery sandpaper to strip away all flaking rust, baked-on powder coating, and paint down to bright, gleaming silver metal. Welding arcs will spatter erratically and epoxy resins will peel off if bonded over residual rust or paint. -
Step 3: Clamp the Pieces in Precise Alignment
Position the fractured tube ends together and clamp them firmly with C-clamps or locking vice-grips. Measure diagonal distances or reference the opposite chair leg to ensure the leg isn't cocked inward or twisted out of square. -
Step 4: For Welding — Set Up, Tack, and Weld the Joint
Suit up in welding gear. Set your inverter welder to 45–60 amps with a thin 2.0mm E6013 rod. Place 2 to 3 small spot tacks around the seam to lock alignment, verify squareness, then lay short, overlapping stitch beads around the joint circumference without dwelling in one spot. -
Step 5: For Epoxy (No-Weld Route) — Mix and Apply Structural Compound
If selecting the no-weld route, mix equal parts of two-part steel epoxy putty or liquid resin until streak-free. Butter the mating edges generously, press the pieces firmly into the clamp, and force a continuous reinforcement collar of putty around the exterior seam line. -
Step 6: Let the Joint Cool or Cure Fully
For welded joints, let the metal cool naturally in ambient air — do not quench with water, which makes thin steel brittle. For epoxy repairs, allow at least 24 full hours at ambient room temperature for complete molecular cross-linking. -
Step 7: Clean Up and Dress the Joint
On welded repairs, chip away glassy slag using a chipping hammer and wire brush. Lightly dress any high peaks with a flap disc on an angle grinder, taking care not to grind away structural weld throat. For epoxy, sand flush with 120-grit sandpaper. -
Step 8: Test Stability Gradually, Then Prime & Paint
Before welcoming guests to sit, place the chair on level ground. Lean your upper body weight onto the repaired corner, bounce gently with hand pressure, and verify there is zero creaking, flex, or hairline fracturing. Degrease with mineral spirits, apply two coats of anti-rust red oxide primer, and finish with outdoor enamel paint matching the chair's original finish.
💡 Pro-Tips From the Field
- Welding is far superior for heavy daily seating: While structural epoxy is great for light decorative patio chairs, repeated dynamic flexing and weight shifting over months can cause adhesive fatigue. For primary outdoor seating, an inverter weld is the truly permanent fix.
- Inspect all companion joints preemptively: If one leg weld cracked due to vibration or corrosion, the other corner welds have endured identical fatigue. Check for hairline cracks in the paint around adjacent joints and reinforce them during the same session.
- Practice on thin scrap tubing first: Standard gate iron is 2mm to 3mm thick, but lawn furniture is often paper-thin 16-to-18 gauge (1.2mm). Practice striking an arc and running quick 1-second tacks on scrap pipe to calibrate your travel speed before touching the chair.
- Insert an internal sleeve for hollow leg breaks: If the tube broke cleanly in two, slide a 50mm long solid steel rod or slightly smaller pipe dowel inside the hollow core before clamping and welding. This provides internal backing and prevents melt-through.
Troubleshooting Common DIY Mistakes
- "I struck an arc and immediately burned a hole through the tubing"? Furniture metal is extremely thin. Turn your inverter dial down to 40-50A, switch to 1.6mm electrodes, and use pulse/tack technique rather than running continuous drag beads. If a hole has formed, bridge it with small intermittent tacks or weld a small patch plate over the opening.
- "The epoxy bond sheared off within a few weeks of use"? The epoxy was either a general-purpose craft adhesive unrated for dynamic shear loads, the metal had residual grease or rust beneath the bond, or the repair wasn't allowed 24 hours of undisturbed cure time. For high-stress seating, grind clean and weld.
- "The chair rocks or wobbles on a flat patio after repair"? The pieces shifted slightly inside the clamp while welding or curing. Before the weld freezes or epoxy hardens, always set all 4 chair legs on a dead-flat surface (such as a tiled floor) to ensure all feet touch evenly.
Conclusion & Related Reads
A broken chair weld doesn't have to mean discarding a comfortable outdoor seating set. Whether you re-fuse the steel using a compact home inverter welder or bond it with a high-strength structural epoxy sleeve, diligent surface prep and square clamping alignment ensure your garden furniture stays safe and sturdy through seasons of use.
Explore more metal fabrication, welding, and outdoor maintenance tutorials on CarpenterWala:

Rajesh Sharma
Verified SpecialistMaster Carpenter & Woodwork Consultant
Over 15 years of custom woodworking, furniture restoration, and modular interior fittings experience in Bangalore.
⚖️ DIY vs. Hiring a Professional: When to Call an Expert
✓ Safe to DIY
- Minor screw tightening or loose hinge lubrication
- Basic component replacement with matching dimensions
- Routine surface touch-ups and non-structural adjustments
⚠️ Hire a Verified Pro
- Structural woodwork warping, masonry drilling, or rotted frames
- High electrical voltages, MCB trips, or water line pipe bursts
- Multi-room installations requiring specialized power equipment
💬 Comments (0)