📑 Table of Contents (18 sections) — Tap to expand
⚡ Quick Takeaway (Position-0 Summary)
For Indian homes, the most practical approach is combining finishes: use wallpaper on dry, prominent accent walls (behind the master bed or living room sofa) for instant designer texture and pattern, while keeping washable emulsion paint in high-traffic, humid, or splash-prone zones like kitchens, corridors, and bathrooms. Always resolve underlying wall dampness first and test an inconspicuous sample before installing peel-and-stick panels.
⚠️ Critical Safety Warnings & Precautions
When trimming wallpaper edges around live modular switchboards and plug sockets, switch OFF the room’s main MCB at the distribution board. Never use metallic utility knives near live electrical socket contacts.
A living room can feel tired even when most of its paint is perfectly fine. Perhaps the wall behind the sofa looks bare, or the bedroom needs a little more warmth. Before booking painters for the whole flat, take a closer look at what actually needs changing.
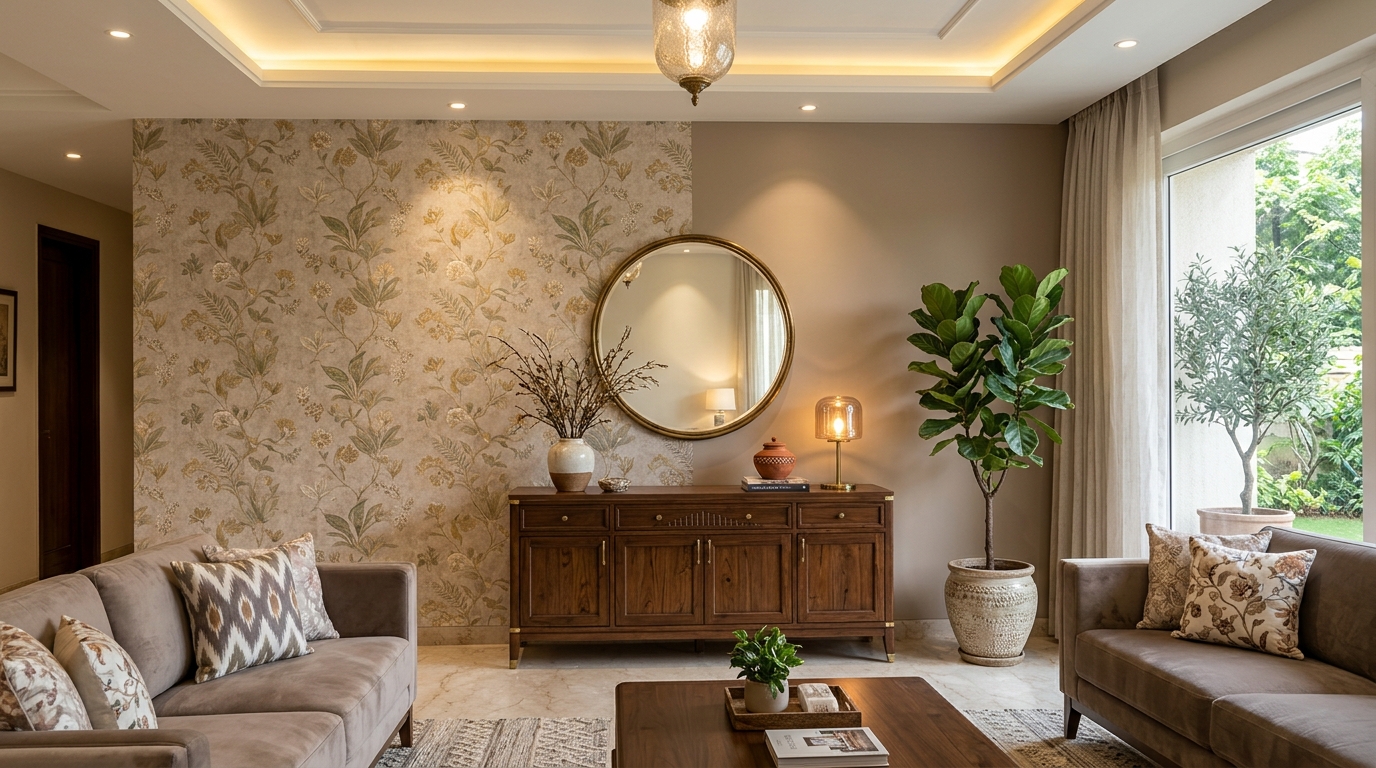
Wallpaper can give a dry interior wall a pattern or finish that would take considerably more work to create with paint. A botanical print behind the bed, a quiet linen effect in the living room or a small patterned corner beside a desk can be enough.
For many homes, a sensible plan is to use both finishes: wallpaper on selected interior walls, paint wherever it suits the surface and daily use, and suitable exterior coatings outside. The budget depends on the area you change and the material you choose. Wallpaper is not automatically the cheaper option.
Wallpaper and paint compared
Wallpaper works particularly well when the design itself is the main reason for changing a wall. Paint makes sense when you want a plain finish, need to refresh a large area or expect regular cleaning and future colour changes.
| What matters | Interior paint | Peel and stick wallpaper | Traditional pasted wallpaper |
|---|---|---|---|
| Appearance | Plain colour and painted effects | Printed patterns and murals | Broad choice of prints and textures |
| Preparation | Repairs and the specified paint system | A sound surface compatible with the adhesive | Repairs and the specified primer or sealer |
| DIY work | Masking, painting and drying between coats | Careful alignment and smoothing | Adhesive preparation and accurate hanging |
| Repairs | Local touch-ups may show a shade difference | Matching offcuts may help with small repairs | Matching paper and careful repair work |
| Removal | Prepare the surface for the next coat | Product and paint condition affect removal | Method depends on the paper and adhesive |
| Budget | Compare the complete painting quote | Include prep, quantity and tools | Include prep, paper, adhesive and labour |
Both finishes depend on the wall underneath. Wallpaper can cover the old colour, but raised patches, loose paint and damp plaster still need attention.
Where to use wallpaper and where to keep paint
Walk through the house before choosing a design. Note where people lean against walls, where the sunlight falls and which corners become damp during the monsoon.
| Area | A practical starting choice | What to check |
|---|---|---|
| Wall behind the bed | Wallpaper | Dryness and how the pattern sits above the headboard |
| Living room feature wall | Wallpaper or paint | Furniture placement, lighting and visible wall area |
| Study or work corner | Wallpaper on one wall | Pattern scale and the view behind your desk |
| Corridors and utility areas | Suitable washable paint | Scuffing and how often the surface needs cleaning |
| Kitchen cooking and sink zones | A finish rated for the exposure | Heat, grease, splashes and cleaning requirements |
| Shower walls and persistently wet areas | A properly specified wet-area finish | Waterproofing and direct water exposure |
| Exterior walls and open balconies | Exterior paint or a specified coating system | Rain, UV exposure, cracks and drainage |
| A wall with seepage | Repair and dry the wall first | Find and fix the source before decorating |
Interior walls where wallpaper earns its place
Start with a wall you will actually see. A mural hidden behind a tall wardrobe adds very little to the room. Behind a bed or sofa, choose a design whose main detail remains visible above the furniture.
For a small room, order a sample before committing to a large print. Hold it against the curtains, flooring and existing paint. Check it in daylight and again under your evening lights; a background that looks cream online may look grey at home.
Places where paint remains useful
Wallpapering one wall does not mean the other walls need a fresh coat. Keep sound, clean paint if it already works with the room.
Repaint where the finish is worn, where you need better washability or where a colour change will make the space feel more coherent. Ceilings can usually stay with their existing painted finish if they are in good condition.
Outside, use products specified for exterior exposure. Ordinary interior wallpaper is unsuitable for an open balcony or a rain-facing wall. Also investigate cracks and leaks before coating them; an exterior repaint alone may not resolve seepage. [1][2]
Check moisture in every climate
Check walls beside bathrooms, below windows and along the lower parts of ground-floor rooms, especially if dampness returns during the rains. A dry-looking patch on a sunny afternoon does not establish that an old leak has been fixed. In humid coastal homes, consider ventilation and seasonal moisture; in hot, dry regions, still check plumbing-adjacent walls and past rain damage before covering them.
Asian Paints advises treating seepage before installing wallpaper. Covering the patch can hide the warning signs while leaving the cause in place. [3]
Choosing wallpaper for a DIY project
For a first attempt, a modest, mostly uninterrupted wall with a forgiving pattern is a good place to begin.
Peel and stick wallpaper has an adhesive backing. You remove the backing gradually as you hang it. Check that the particular product is suitable for your paint finish and wall texture.
Traditional wallpaper needs adhesive. Some products require paste on the wall; others require it on the paper. Follow the roll instructions, including any resting time after applying paste.
The material description and installation method are separate details. Words such as “vinyl”, “non-woven” or “fabric finish” do not, by themselves, mean that a wallpaper is self-adhesive.
Large geometric prints need accurate matching. A mural also has a fixed arrangement: check where its main subject will fall before ordering. An inexpensive extra roll cannot necessarily extend a custom mural.
Planning your budget and quantity
Compare the finished job, including preparation. A wallpaper price per roll and a painting quote per square foot describe different things.
For wallpaper, allow for the material, trimming and pattern matching, wall preparation, delivery, tools and any installation help. For paint, check whether the quote includes repairs, primer, the specified coats, masking and clean-up.
A realistic price comparison
Material choice can change the bill substantially. When checked on 23 October 2026, one Giffywalls marble design listed Standard Paper at ₹129 per sq. ft. and Peel and Stick at ₹209 per sq. ft. The lower displayed price therefore did not describe the self-adhesive option. [4]
At ₹209 per sq. ft., a 10 ft by 9 ft wall would cost ₹18,810 for 90 sq. ft. of wallpaper before any additional allowances or charges. This is one product example, not a general market rate. Confirm the final price and material at checkout.
If the aim is to spend less, start by reducing the area of work. One wallpaper feature wall, with the other sound walls left alone, may suit the room better than redecorating every surface.
Why roll coverage can be misleading
Measure the wall at several points. Use the largest dimensions and the supplier’s specified trimming allowance.
For rolls, calculate how many full-height strips you can cut. For example, consider a wall 3 metres wide and 2.7 metres high:
With a 0.53-metre-wide roll, you need six strips across the wall.
If each cut strip is 2.8 metres long, including trimming, a 10-metre roll gives three strips.
Two rolls would cover those six strips before allowing for pattern matching or defects.
A large pattern repeat can increase that quantity. Send the dimensions and the chosen pattern to the supplier for confirmation. For custom murals, ask how to measure around doors and windows before subtracting openings.
Order matching rolls from the same batch where applicable. Keep a labelled offcut for future repairs.
Where to order wallpaper in India
These are useful starting points for comparing materials and ordering samples. Confirm delivery to your PIN code, the installation method and the return policy for your exact order.
Giffywalls India
Giffywalls offers a dedicated peel and stick wallpaper collection, custom wall sizes and a separate installation guide for self-adhesive materials.
Select the material explicitly on the product page. The same design can be offered in several materials at different prices. Its wallpaper FAQs also explain sample ordering. [4][5]
Magicdecor
Magicdecor has a self-adhesive wallpaper collection with custom sizing. Its collection page offers material samples, which are useful for checking the finish before placing a larger order.
Confirm that the final product selection says peel and stick or self-adhesive. Ask about panel sizes, trimming allowances and the treatment of joins for the design you choose. [6]
Asian Paints Nilaya
Asian Paints Nilaya is another option for browsing wallpaper and arranging the appropriate material and application system.
Its guidance describes using a sealer and wallpaper adhesive, so check the exact product before treating it as a peel-and-stick purchase. It is worth considering when you prefer assistance with preparation or installation. [3]
Before paying, ask one particularly useful question: “Can you send me the installation instructions for this exact material?” That answer is more useful than a general promise that the wallpaper is easy to apply.
What you will need
For a straightforward peel-and-stick installation, gather:
The wallpaper and its installation instructions.
A measuring tape, pencil and spirit level or plumb line.
A wallpaper smoother or felt-edged squeegee.
A sharp trimming knife, spare blades and a straightedge.
Clean cloths and the cleaner recommended for the surface.
Floor protection and a stable stepladder.
A second pair of hands helps with long panels. Traditional pasted paper also needs the specified adhesive and application tools.
Checks before you start
Resolve dampness first. Stop if there is active seepage, mould, loose plaster or recurring salt deposits. Arrange the repair and allow the wall to dry before decorating.
Allow new paint to cure. Touch-dry paint may still be unsuitable for adhesive wallpaper. Waiting times vary: Giffywalls advises at least three to four weeks, while WallPops specifies 30 to 60 days for NuWallpaper. Follow the requirements of your chosen wallpaper and paint system. [5][7]
Test a sample. Use it to check adhesion, appearance and removal on an inconspicuous part of the actual wall. Follow the supplier’s test period. “Removable” wallpaper can still lift poorly bonded paint.
Plan around electrical fittings. Keep blades and moisture away from sockets. If a cover needs removing, have the circuit safely isolated and get qualified help where needed.
How to apply peel and stick wallpaper
Structured Step-by-Step Execution Guide
- Step 1 - Inspect and prepare the surface: Remove loose material and repair small holes or uneven patches. Follow the wallpaper supplier’s requirements for priming or sealing. Avoid sticking directly onto dusty putty, chalking paint or unfinished plaster unless the product specifically permits it.
- Step 2 - Clean the wall and let it dry: Remove dust and grease with the recommended method. Give any damp cleaning time to dry fully. Even a small dirty patch can interfere with adhesion.
- Step 3 - Lay out the panels: Check the design, colour and panel sequence before removing any backing. Report printing damage or a mismatch before cutting or hanging the material.
- Step 4 - Mark a vertical starting line: Use a spirit level or plumb line. A room corner may be slightly out of square, so use a measured vertical guide for the first panel.
- Step 5 - Position the first panel: Expose a small section of backing at the top. Align the panel with your guide and leave the trimming allowance specified in the instructions. Check its position before pressing firmly.
- Step 6 - Work down gradually: Peel away more backing in manageable sections. Smooth the paper from the centre towards the edges as you go. Keep the loose section supported and avoid pulling the material to force it into position.
- Step 7 - Match the next panel: Check the pattern at eye level and lower down before fixing the whole strip. Follow the product instructions for the join: some materials require touching edges, while others specify an overlap or trimming method.
- Step 8 - Trim and inspect: Use a sharp blade and straightedge for the edges, protecting the underlying surface. Leave complicated fittings or awkward access to an installer. Check seams and corners in good light, then keep the room conditions within the manufacturer’s guidance.
Use the Giffywalls peel and stick installation guide alongside the instructions supplied with your order. The sequence above is a general guide; product-specific requirements take priority. [8]
Before and after checklist
Before installation: Confirm that the wall is sound and dry, the sample works, the quantity is sufficient and the panels match.
During installation: Check the first panel carefully, match each strip before pressing it down and follow the specified seam method.
After installation: Inspect the joins, save the order details and offcuts, and keep the care instructions somewhere easy to find.
Clean according to the material. A dry soft brush may suit a delicate finish; a washable product may permit gentle wiping. Test first, and avoid soaking seams or using abrasive cleaners. [9]
Troubleshooting & Common Problems: Troubleshooting common problems
Edges keep lifting
Check for dust, unsuitable paint, wall texture or moisture. Ask the supplier about a compatible repair method. Adding random household glue can leave marks and make later removal harder.
Bubbles appear while hanging
Where the product allows repositioning, gently lift the affected section and smooth it down again. Persistent or later bubbles need a closer look at the bond and wall condition. Check with the supplier before puncturing the paper.
The pattern drifts between strips
Recheck the first panel’s vertical alignment and the panel order. Stretching the next strip to compensate can make the mismatch worse. Stop early while correction is still manageable.
Paint comes away during removal
The underlying paint bond may have failed. Pause and ask the supplier for its removal method. Repair the surface before applying another finish.
Frequently asked questions
Using wallpaper over existing paint
Sound existing paint may be a suitable base if the wallpaper manufacturer approves the surface and finish. Flaking, powdery or damp paint needs attention first.
Preparing an unpainted wall
You may not need a decorative colour coat, but the wall can still require repairs, primer or sealer. Ask the supplier to specify the full preparation system.
Choosing wallpaper for a rented flat
Get the landlord’s agreement and test the product on the actual surface. Consider possible paint repair costs when comparing removable options.
Choosing wallpaper for kitchens and bathrooms
Some products permit use in humid rooms, but suitability depends on the exact product, ventilation and exposure. For a first DIY project, choose a dry wall away from cooking heat and direct splashes.
Deciding when to call an installer
Get help with stairwells, high walls, expensive murals, extensive repairs or complicated corners. A small, accessible wall is a more manageable first project.
Wrapping up
Choose the wall before you choose the wallpaper. A well-placed print can give a bedroom or living room the change you want while allowing you to keep existing paint that still looks good.
Order a sample, confirm the material and spend time on preparation. Keep exterior work on a suitable exterior coating system, and fix moisture problems before choosing either finish.
If the wall needs repairs or a fresh painted base, explore Carpenterwala’s painting services before starting the wallpaper installation.
Related Guides & Services on Carpenterwala:
Sources and product guidance
Product information and the example price were checked on 23 October 2026. Prices, material options and delivery terms can change.
- [1] WallPops product FAQs including indoor use
- [2] Asian Paints exterior wall coatings and waterproofing
- [3] Asian Paints Nilaya application and seepage guidance
- [4] Giffywalls marble design and material prices
- [5] Giffywalls wallpaper FAQs and samples
- [6] Magicdecor self-adhesive collection and samples
- [7] WallPops curing and product compatibility guidance
- [8] Giffywalls peel and stick installation instructions
- [9] Asian Paints wallpaper care and preparation FAQs

Amit Verma
Verified SpecialistLead Wall Finishing & Surface Decor Consultant
Wall surface finishing specialist with over 12 years of experience in interior wallpaper installations, peel-and-stick applications, and moisture diagnostics for Bangalore homes.
⚖️ DIY vs. Hiring a Professional: When to Call an Expert
✓ Safe to DIY
- Minor screw tightening or loose hinge lubrication
- Basic component replacement with matching dimensions
- Routine surface touch-ups and non-structural adjustments
⚠️ Hire a Verified Pro
- Structural woodwork warping, masonry drilling, or rotted frames
- High electrical voltages, MCB trips, or water line pipe bursts
- Multi-room installations requiring specialized power equipment
💬 Comments (0)