📑 Table of Contents (9 sections) — Tap to expand
⚡ Quick Takeaway (Position-0 Summary)
To fix a dual-flush toilet button that stays pressed down, remove the button's outer cap by twisting or unclipping it, check the internal spring and plunger mechanism for misalignment or debris, clean and realign it, and if the spring itself is broken, replace the button assembly entirely to restore proper spring-back action.
Why Dual-Flush Buttons Jam and Fail to Spring Back
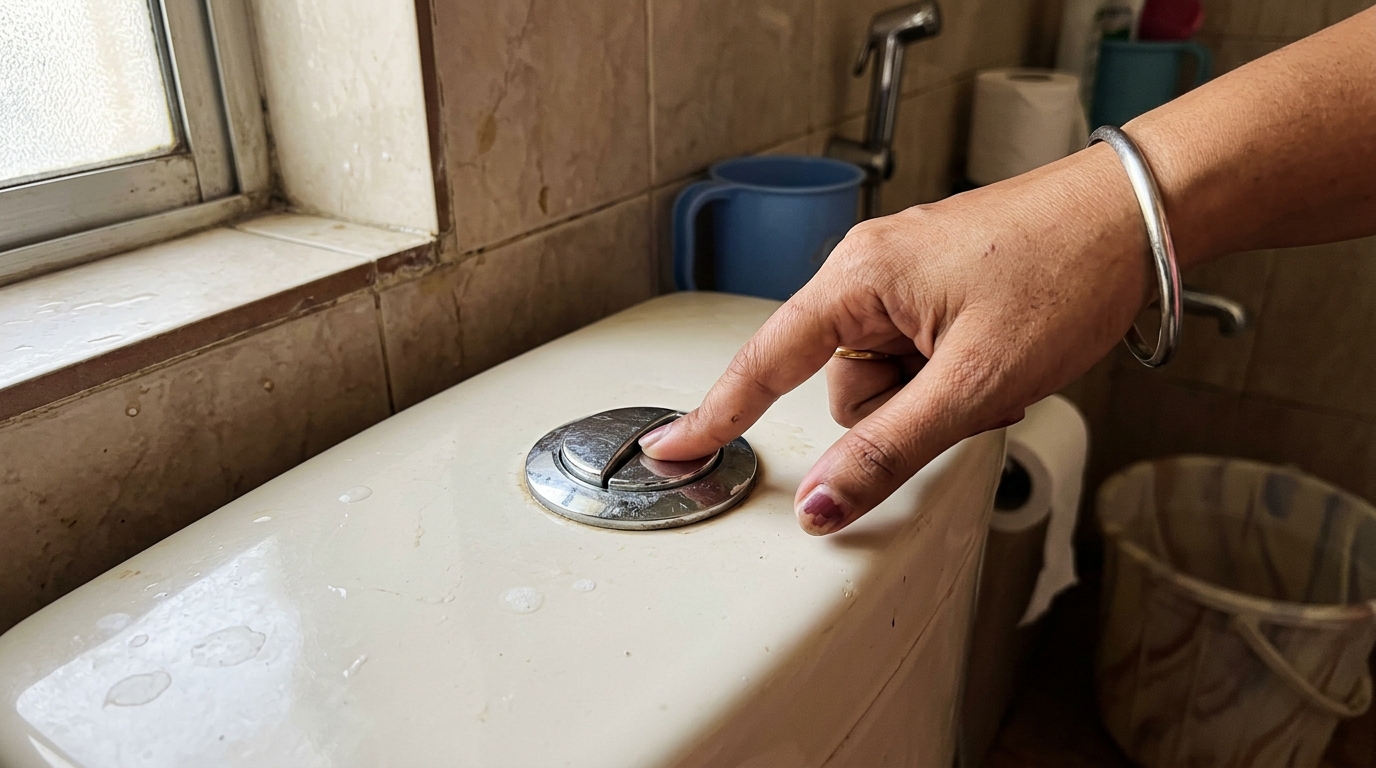
You press the half-flush or full-flush button on your dual-flush toilet cistern, and instead of springing back up after releasing, it stays pressed in — sometimes causing water to keep running continuously, sometimes just sitting stuck without obviously affecting the flush function but clearly not working as designed. Dual-flush buttons have become the standard on most modern Indian bathroom cisterns because of their water-saving two-option design, but this convenience comes with a slightly more complex mechanism than old-style single lever flushes, and that complexity is exactly where this kind of stuck-button problem originates.
Inside a dual-flush button assembly, there's typically a spring-loaded plunger mechanism for each button (half and full flush) that connects down into the cistern's internal flush valve. Over years of repeated pressing, the internal spring that's supposed to push the button back up after release can weaken, become misaligned, or occasionally snap. Separately, hard water mineral deposits or simple dust and grime can build up around the moving parts inside the button housing, creating enough friction to prevent the smooth spring-back action even when the spring itself is still functional. Either way, the button staying pressed down is a mechanical issue inside the button assembly, not something wrong with the flush valve or syphon mechanism deeper in the tank.
What You Will Need
Gather these basic household hand tools and supplies before inspecting the cistern lid:
Essential Tools:
- Flathead screwdriver: For gently releasing snap tabs or prying bezel edges.
- Torch / flashlight: To clearly inspect tiny internal spring recesses and catches.
- Small brush or old toothbrush: For scrubbing away dried mineral crust and grime.
Materials & Consumables:
- White vinegar: For dissolving calcium and hard water limescale from moving parts.
- Clean microfiber cloth: For wiping parts dry and lint-free.
- Replacement dual-flush button assembly: Needed if the internal spring is broken (match your cistern brand — Cera, Hindware, Parryware, or Jaquar).
⚠️ Critical Safety Warnings
Read this before you start:
- Address continuous running water immediately: If the stuck button causes water to run continuously through the pan, this wastes hundreds of liters of overhead tank water daily. Treat this as an urgent repair to avoid high utility bills and pump burnouts.
- Pry plastic retaining tabs gently: Cistern button housings and shrouds are molded from lightweight ABS or chrome-plated plastic. Applying excessive leverage with a metal screwdriver can snap retaining clips permanently.
- Keep miniature springs and clips organized: Dual-flush assemblies feature tiny coiled return springs and pivot pins. Keep them in a shallow bowl away from children and sink drains during disassembly.
- Isolate water supply if accessing the tank interior: If you need to remove the cistern lid completely or touch internal siphon towers, shut off the wall angle valve beforehand.
Step-by-Step Practical Execution Guide
Follow these 10 practical steps to free jammed dual-flush buttons, descale internal springs, or replace a damaged assembly:
-
Step 1: Observe the Exact Problem
Press and release the stuck button a few times, noting whether it stays fully pressed in, partially pressed, or returns but feels stiff and sluggish. This diagnostic check helps determine whether you're dealing with light mineral friction or a snapped return spring. -
Step 2: Remove the Button's Outer Cap or Housing
Most dual-flush buttons either twist off counterclockwise (bayonet lock) or feature a perimeter snap-ring. Check your cistern model (such as Parryware, Cera, or Hindware) and gently unthread or unclip the chrome outer bezel to expose the internal plunger assembly. -
Step 3: Inspect the Internal Plunger and Spring
With the cap removed, inspect the dual plunger pushrods and individual return springs. Look closely for a slipped spring, a bent guide shaft, or gritty white mineral scale binding the sliding surfaces. -
Step 4: Clean the Mechanism
Use a small brush or old toothbrush to sweep away accumulated soap scum, airborne dust, and powdery mineral deposits from the plunger sleeve and spring track. Often, clearing this grit instantly restores free spring-back action. -
Step 5: Descale With Vinegar if Needed
If chalky white limescale has encrusted the plastic guide tubes or springs, soak a cloth in white vinegar and wrap it around the components for 10 to 15 minutes. The mild acetic acid dissolves hard water scale without harming plastic polymers. -
Step 6: Test the Mechanism Manually
With the bezel still removed, press each plunger down with your bare thumb and let go. Confirm that both half-flush and full-flush rods snap back up promptly without hitching or sticking. -
Step 7: Realign a Slightly Shifted Spring
If a spring has shifted off its central locator boss or cocked sideways, use your fingertips or needle-nose tweezers to reseat it squarely onto its seat. Avoid overstretching or distorting the coil tension. -
Step 8: Reassemble the Button Housing
Once smooth movement is verified, realign the push buttons with their respective levers and thread or press the chrome outer housing back into the cistern lid until firmly locked. -
Step 9: Test the Full Flush Function
Press the half-flush button and confirm that water empties partially and shuts off cleanly. Next, press the full-flush button to verify full reservoir discharge, ensuring both buttons rebound instantly to their flush height. -
Step 10: Replace the Button Assembly if the Spring Is Broken
If an internal stainless steel spring has snapped in half or lost its temper entirely, the mechanism cannot be reliably repaired with glue. Procure an exact matching aftermarket or OEM replacement button unit (typically ₹150–₹350) and swap the entire assembly.
💡 Pro-Tips From the Field
- Preventive descaling in hard groundwater zones: If your apartment uses borewell water, descale the cistern button unit every 6 to 12 months with vinegar before mineral buildup crystallizes into a solid jam.
- Check internal drop-rod and cable alignment: In cable-operated or push-rod flush valves, verify that the vertical plastic rods beneath the buttons have approximately 1mm to 2mm of free play. If threaded too tight, they keep the bottom flush valve continuously cracked open.
- Photograph brand markings before visiting hardware shops: Cistern button thread diameters (38mm vs 48mm vs 58mm) differ across brands. Take a quick photo of the underside markings and diameter before purchasing replacement assemblies.
Troubleshooting Common DIY Mistakes
- "I cleaned it but the button is still sticking occasionally."
Residual mineral deposits or grime may still be present in less accessible parts of the mechanism. Repeat the vinegar descaling treatment, giving it longer to work, and check that you've reached all visible moving parts of the plunger assembly, not just the most obvious surfaces. - "Button cap won't come off, I'm worried about breaking it."
Check for a specific release mechanism rather than just pulling or twisting with force. Some models have a small tab or button you need to press simultaneously while twisting. If you genuinely can't identify the release method, searching for your specific cistern brand's flush button removal instructions can clarify the correct approach before you risk cracking the plastic. - "Replaced the whole button assembly but water still runs continuously after flushing."
This suggests the issue isn't actually the button mechanism at all, but rather the flush valve or syphon deeper in the cistern not sealing properly after the flush cycle completes. See our dedicated flush tank and cistern repair guide for addressing that separate, deeper mechanism.
Conclusion & Related Reads
A stuck dual-flush button is usually a straightforward cleaning or realignment fix once you get past the slightly unfamiliar internal mechanism compared to older single-lever flushes — and catching it early saves genuinely significant water that would otherwise run continuously while the button sits pressed in.
Related reads on CarpenterWala:

Rajesh Sharma
Verified SpecialistMaster Carpenter & Woodwork Consultant
Over 15 years of custom woodworking, furniture restoration, and modular interior fittings experience in Bangalore.
⚖️ DIY vs. Hiring a Professional: When to Call an Expert
✓ Safe to DIY
- Minor screw tightening or loose hinge lubrication
- Basic component replacement with matching dimensions
- Routine surface touch-ups and non-structural adjustments
⚠️ Hire a Verified Pro
- Structural woodwork warping, masonry drilling, or rotted frames
- High electrical voltages, MCB trips, or water line pipe bursts
- Multi-room installations requiring specialized power equipment
💬 Comments (0)