📑 Table of Contents (7 sections) — Tap to expand
⚡ Quick Takeaway (Position-0 Summary)
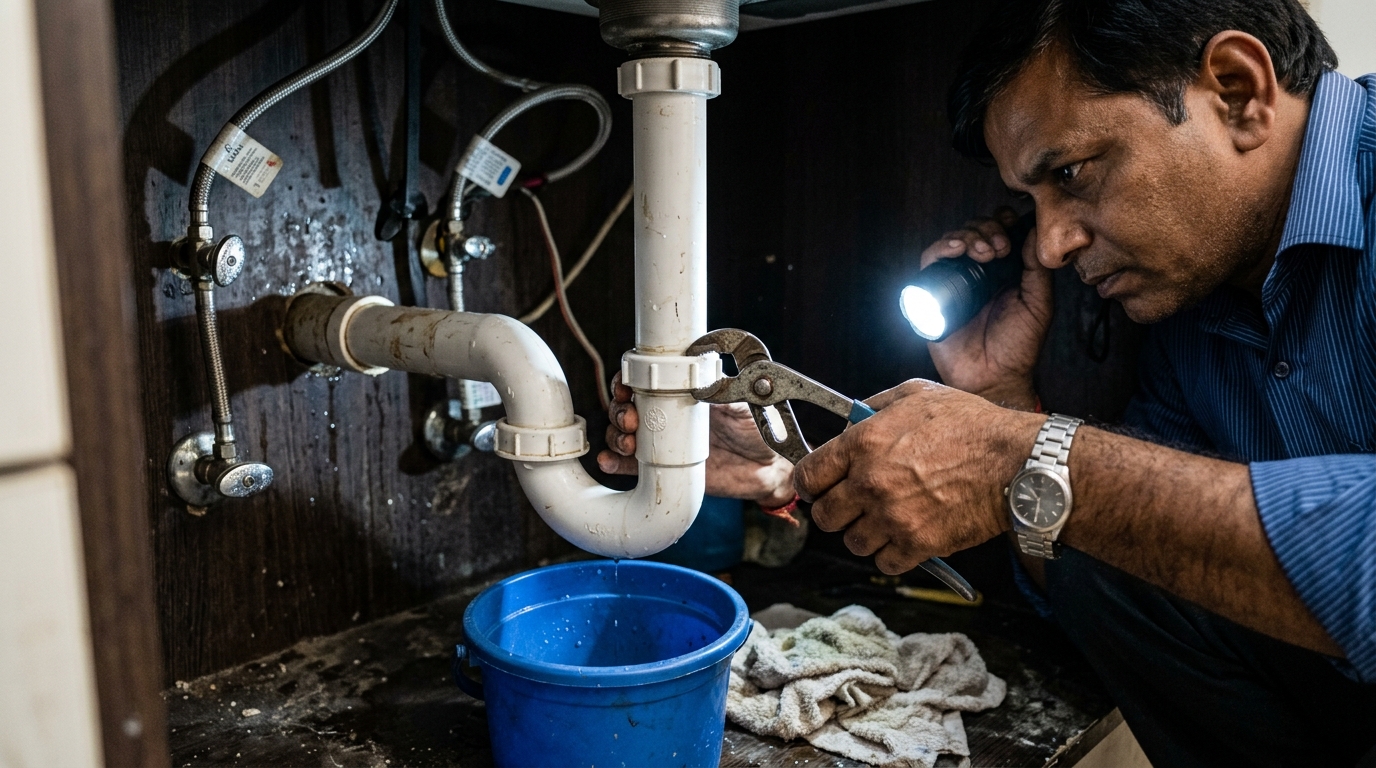
To fix a leaking kitchen sink drain pipe joint, position a bucket beneath the P-trap, unscrew the offending plastic slip nut by hand or with adjustable pliers, inspect the beveled rubber or nylon slip washer for degradation or inversion, clean the mating pipe threads of grime, install a fresh matching washer with the taper facing into the pipe socket, hand-tighten firmly, and add a quarter-turn with pliers to achieve a 100% watertight seal.
The Hidden Culprit Behind Under-Sink Water Damage
Opening your under-sink modular kitchen cabinet only to find soggy plywood, swollen base laminates, foul mildew, or an active puddle is an all-too-common headache in Indian households. The tubular drainage assembly connecting your stainless steel sink basin to the wall drain pipe consists of multiple slip-joint fittings, a P-trap (or bottle trap), and tailpieces. Because these joints rely on compression washers rather than solvent glue, they are the most vulnerable failure point in the entire drainage system.
Under-sink pipe joints endure punishing daily conditions: scalding boiling water from drained pasta and pressure cookers alternating with icy tap water, greasy curry residues, chemical dishwashing detergents, and mechanical vibrations when heavy pots knock against the sink basin. Over 3 to 5 years, rubber slip-joint washers harden, lose their elasticity, flatten out, or develop microscopic tears. Water seeps through the relaxed compression seal, steadily ruining expensive modular cabinetry.
Fortunately, fixing a dripping drain joint does not require hiring an expensive plumber or tearing apart your cabinetry. With a simple pair of groove-joint pliers, an inexpensive replacement washer from your local hardware shop, and proper assembly technique, you can seal the leak permanently in under 20 minutes.
What You Will Need
Gather the following plumbing tools and replacement seals before opening the cabinet:
- Adjustable Groove-Joint Pliers: 10-inch or 12-inch water pump pliers (Channellock style) with padded jaws.
- Shallow Catch Bucket & Old Towels: To capture trapped wastewater and sludge when the P-trap is disassembled.
- LED Work Light or Flashlight: To illuminate deep, shadowy cabinet corners.
- Replacement Slip-Joint Washers: 32mm (1.25-inch) or 40mm (1.5-inch) beveled rubber or poly washers matching your pipe diameter.
- Replacement PVC Slip Nuts: In case the original plastic nut is cracked or stripped.
- PTFE Thread Seal Tape: For wrapping male threads on rough or aged couplings.
- Nitrile Rubber Gloves: To maintain hygiene when handling stagnant drain grease.
⚠️ Critical Safety Warnings
Read this before you start:
- De-energize under-sink electrical appliances: Indian kitchens frequently feature 6A/16A electrical sockets under the sink for water purifiers (RO systems), instant geysers, or chimney lines. Unplug all appliances and ensure no moisture drips near socket boxes.
- Wear gloves when handling waste pipes: Kitchen trap water harbors high bacterial colonies, decayed food grease, and detergent chemicals. Wear protective nitrile gloves and avoid touching your face.
- Never over-torque plastic slip nuts: PVC and polypropylene plumbing threads are fragile. Overtightening with heavy pipe wrenches will crack the collar or strip the plastic threads instantly, turning a washer fix into a full plumbing replacement.
- Persistent sewer gas smells: If fixing the joint doesn't stop foul sulfur or sewer odors, the P-trap water barrier may be siphoning dry due to inadequate drain venting, requiring a mechanical air admittance valve (AAV).
Step-by-Step Practical Execution Guide
Follow these 10 methodical steps to diagnose, disassemble, replace, and pressure-test your drain pipe connections:
-
Step 1: Pinpoint the Precise Source of the Leak
Empty the under-sink cabinet. Dry all pipe sections completely with an old towel. Turn on the kitchen tap on full blast and inspect each joint with an LED flashlight. Look closely at the sink strainer nut, the upper tailpiece slip nut, and both elbows of the P-trap curve to identify whether water drips from the threads or runs down from above. -
Step 2: Position Your Catch Bucket and Rags
Place a wide plastic bucket or basin directly below the P-trap bend. Spread absorbent shop rags around the cabinet floor to catch accidental splashes. The P-trap holds approximately 250ml to 500ml of standing water designed to block sewer gas. -
Step 3: Loosen the Slip Nut Counterclockwise
Grip the slip nut above the leaking joint. Turn it counterclockwise (lefty-loosey). In most modern PVC installations, the nut can be unscrewed by hand. If it is stiff or stuck with dried grease, gently grip the nut ribs with adjustable pliers and apply steady rotational leverage. -
Step 4: Disconnect the Joint and Drain Standing Water
Carefully wiggle and lower the P-trap tube downward to disengage the slip connection. Allow the trapped foul water to pour completely into your bucket. Support the vertical tailpiece with your spare hand so you don't torque the sink strainer above. -
Step 5: Inspect the Old Compression Washer and Nut
Slide the washer off the male pipe end. Examine it under good light: is the rubber cracked, hardened like plastic, squashed flat, or chewed up? Also inspect the plastic slip nut for fine hairline stress cracks along the threaded collar. -
Step 6: Clean Grime and Limescale From Pipe Mating Surfaces
Use a damp sponge or scouring pad with dish soap to clean the exterior pipe walls and interior socket rim. Scrape away hardened grease rings, white mineral scale, and old thread shreds so the new washer seats against smooth, pristine PVC. -
Step 7: Orient the New Beveled Washer Correctly
This is the most critical step: slip the plastic nut onto the tailpiece with threads facing downward toward the joint. Next, slide the new beveled rubber or poly washer onto the pipe with the tapered (pointed) edge pointing down into the flared pipe socket. The flat face of the washer must face upward against the inside of the nut. -
Step 8: Push the Joint Together and Hand-Tighten
Push the male pipe straight down into the female socket, ensuring it slides in at least 25mm to 30mm. Ensure the pipe isn't cocked sideways at an angle. Spin the slip nut clockwise onto the threads by hand until snug, verifying that the threads engage smoothly without cross-threading. -
Step 9: Snug With Pliers Just One Quarter Turn
Once hand-tight, grip the slip nut with your adjustable pliers. Turn the nut an additional 1/4 to 1/2 turn—no more. You will feel firm rubber compression resistance. Excessive torque will distort the washer out of round and cause a leak. -
Step 10: Perform a Dynamic Water & Head Pressure Test
Wipe the entire assembly dry with toilet paper. Fill the sink basin to the brim with water, then pull the stopper plug to release a sudden torrent of rushing water (dynamic head pressure). Feel every joint with dry bare fingers. If paper remains bone dry, the repair is 100% complete.
💡 Pro-Tips From the Field
- Remember: Taper points in the direction of water flow: The most common amateur mistake is installing the wedge-shaped slip washer upside down. The narrow tapered nose must seat inside the receiving socket; the flat back is pushed by the nut.
- Never use thread sealant paste (pipe dope) on rubber slip joints: Slip nuts do not seal via thread friction; they seal by crushing the rubber washer radially against the pipe. Adding sticky pipe dope to plastic threads only lubricates the nut into slipping or attracts grit.
- Replace all washers simultaneously: If you've disconnected the trap to replace the upper washer, spend ₹20 more to replace the wall outlet washer and P-trap union washer as well. Preventive replacement saves having to reopen the cabinet next month.
- Support long horizontal waste runs: If your drain pipe travels horizontally more than 500mm toward the wall drain, install a plastic pipe clip or strap. Sagging pipes put lateral bending leverage on slip joints, unseating the washers.
Troubleshooting Common Mistakes
- "I installed a brand-new washer and it is still dripping"? Check that the pipe is inserted deep enough into the socket. If the tailpiece is barely entering the collar by 5mm, the washer cannot compress properly. Also verify the pipe hasn't been cut at a crooked angle or deformed out of circular roundness.
- "The plastic nut keeps skipping threads when I tighten it"? The nut threads are stripped or the nut was cross-threaded. Unscrew the nut, check the PVC threads on the mating pipe, and install a brand-new high-grade polypropylene slip nut.
- "Water is dripping down the threads from above the slip nut"? The leak is not coming from the slip joint; it is originating higher up from the sink basket strainer flange seal beneath the stainless steel sink basin. You will need to re-bed the strainer basket with fresh plumber's putty or silicone sealant.
Conclusion & Related Reads
A leaking sink drain joint can silently rot your kitchen cabinetry and breed toxic mold, but resolving it is a straightforward 15-minute DIY task. By replacing tired compression washers, respecting proper washer bevel orientation, and tightening with restrained torque, you ensure dependable, leak-free drainage every time you wash dishes.
Explore more plumbing, kitchen repair, and home maintenance tutorials on CarpenterWala:

Rajesh Sharma
Verified SpecialistMaster Carpenter & Woodwork Consultant
Over 15 years of custom woodworking, furniture restoration, and modular interior fittings experience in Bangalore.
⚖️ DIY vs. Hiring a Professional: When to Call an Expert
✓ Safe to DIY
- Minor screw tightening or loose hinge lubrication
- Basic component replacement with matching dimensions
- Routine surface touch-ups and non-structural adjustments
⚠️ Hire a Verified Pro
- Structural woodwork warping, masonry drilling, or rotted frames
- High electrical voltages, MCB trips, or water line pipe bursts
- Multi-room installations requiring specialized power equipment
💬 Comments (0)