📑 Table of Contents (9 sections) — Tap to expand
⚡ Quick Takeaway (Position-0 Summary)
To reseal silicone caulking around a leaking kitchen sink countertop, scrape out all old, cracked silicone completely, clean the joint with isopropyl alcohol, apply a continuous new bead of kitchen-grade silicone sealant along the sink-to-countertop joint, smooth it with a wet finger or caulking tool, and let it cure fully before using the sink.
The Anatomy of Sink Rim Leaks: Why Silicone Fails Over Time
Water seeping into the gap between your kitchen sink and the surrounding countertop, visible as discoloration, a lifting edge of old caulk, or actual water pooling just beneath the sink's rim after use. The silicone seal around a sink's perimeter does genuinely important work — it's the only thing preventing water from constantly running down into the cabinet below through the inevitable small gap where the sink basin meets the countertop surface.
Silicone caulk, despite being a flexible, water-resistant material, has a realistic lifespan of a few years before it starts degrading — exposure to constant moisture, temperature changes from hot and cold water use, and general wear from cleaning and scrubbing near the sink edge all contribute to gradual cracking, shrinking, and eventually pulling away from one or both surfaces it's meant to bond. Once this seal fails even slightly, water finds its way through that gap during every single use of the sink, and left unaddressed, this leads to the kind of cabinet base water damage covered in our dedicated MDF repair guide — making this resealing job a genuinely preventive task worth doing proactively rather than waiting for visible damage.
What You Will Need
Gather these specialized sealing tools and materials before opening the tube:
Essential Tools:
- Utility knife or specialized caulk removal tool: With fresh blades to cleanly slice old rubber beads.
- Plastic scraper / razor scraper: Plastic scraper for scratch-prone composite sinks, razor for granite.
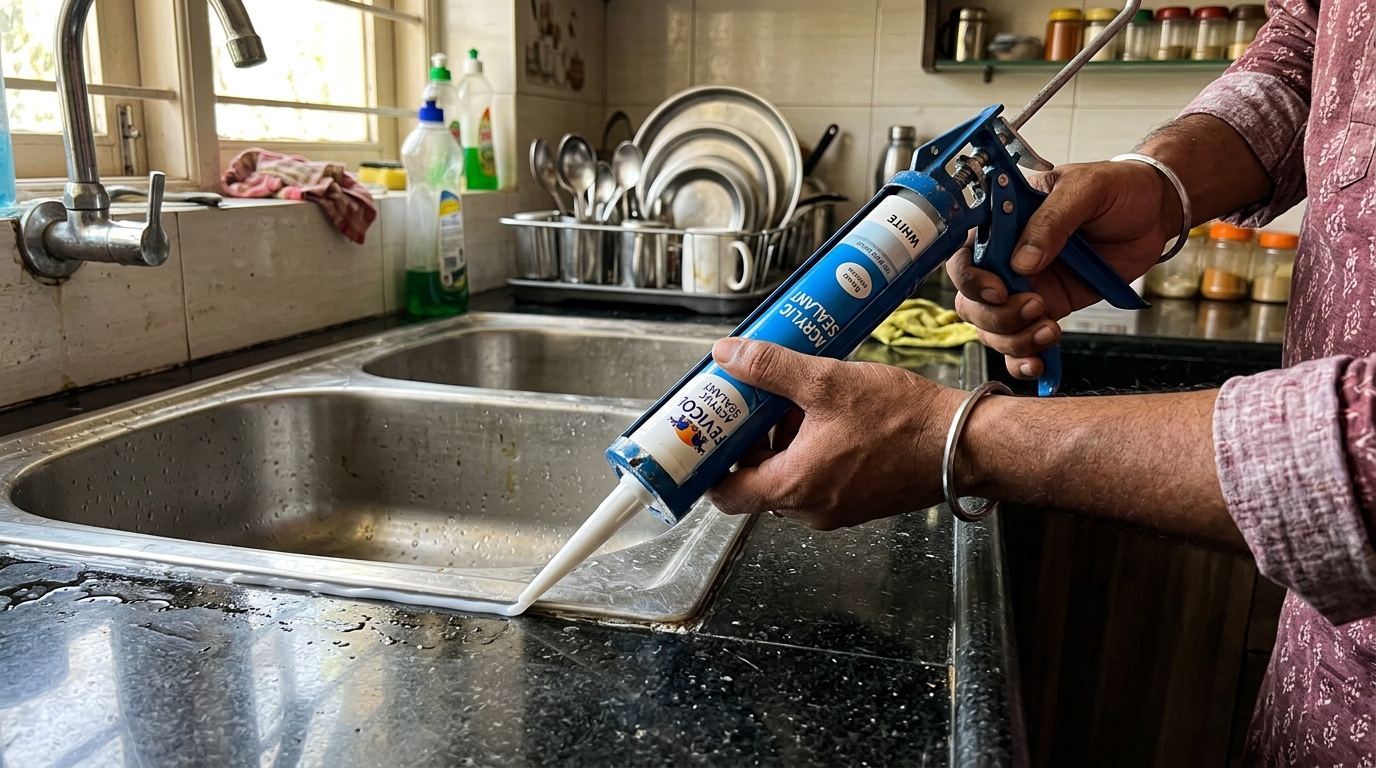
- Caulking gun: Heavy-duty skeleton gun for smooth, controlled trigger feed.
- Damp microfiber cloth: For immediate edge cleanup and wiping tools.
Materials & Consumables:
- Kitchen & bathroom silicone sealant: Neutral-cure 100% silicone with anti-fungal / mildew additives.
- Isopropyl alcohol (rubbing alcohol): For degreasing and eliminating moisture traces before application.
- Painter's masking tape: 1-inch low-tack crepe tape for razor-sharp seal borders.
- Small bowl of soapy water: For lubricating your finger or caulking smoothing tool.
⚠️ Critical Safety Warnings
Read this before you start:
- Surfaces must be 100% bone dry: Silicone will not bond to damp stone, stainless steel, or porcelain. Any moisture trapped in the seam creates instant air pockets and voids your watertight barrier.
- Ventilate kitchen during application: Standard acetoxy-cure silicones release sharp acetic acid (vinegar) fumes during the initial curing phase. Keep kitchen windows open and exhaust chimneys running.
- Respect the full 24-hour curing window: Even if the surface feels touch-dry in 30 minutes, turning on the kitchen tap prematurely will blast the uncured core out of the joint, causing immediate failure.
- Inspect under-sink plywood for existing rot: If past seepage has turned cabinet MDF mushy or black with mold, dry and treat the wood carcass before sealing the countertop perimeter.
Step-by-Step Practical Execution Guide
Follow these 11 practical steps to strip deteriorated sealant and lay an immaculate, waterproof silicone bead:
-
Step 1: Slice and Strip All Old Silicone Caulk
Take your utility knife and make two shallow, continuous cuts: one along the stainless steel sink lip, and the second along the granite countertop edge. Pry the loose end up and peel the old rubber strip away in long continuous lengths. -
Step 2: Scrape Away Stubborn Residue and Mold Crust
Use a stiff plastic scraper to shave off flattened residual silicone film clinging to the stone or steel surfaces. Never apply fresh silicone on top of old silicone — the two layers will not vulcanize together. -
Step 3: Degrease the Gap With Isopropyl Alcohol
Soak a clean cloth in pure isopropyl alcohol. Rub vigorously along the entire perimeter joint to dissolve cooking oil film, dish soap scum, and microscopic silicone dust. -
Step 4: Allow Surfaces to Dry Completely
Wait 10 to 15 minutes for the alcohol to fully evaporate. Use a dry paper towel or hairdryer on cool setting to guarantee the recess is bone dry to the touch. -
Step 5: Apply Masking Tape for Crisp, Sharp Lines
Apply parallel runs of blue painter's tape: one strip on the granite countertop 3mm away from the sink rim, and a second strip directly along the stainless steel sink flange. -
Step 6: Snip the Silicone Nozzle at a 45-Degree Angle
Cut the plastic cartridge nozzle tip at a 45-degree angle, making the orifice opening roughly 4mm to 5mm wide. Puncture the inner aluminum tube foil with the caulking gun's seal-punch rod. -
Step 7: Extrude a Continuous, Unbroken Bead
Hold the caulking gun at a 45-degree angle with the nozzle tip pointing forward. Squeeze the trigger with steady, measured pressure, pushing the bead smoothly into the joint rather than dragging it. -
Step 8: Smooth the Bead Immediately in One Motion
Dip your index finger into a bowl of soapy water (or use a silicone profile tool). Run your finger along the wet bead in one fluid, uninterrupted sweep, pressing the silicone deep into the gap and feathering it against the tape edges. -
Step 9: Peel Away Masking Tape Immediately While Wet
Within 2 minutes of smoothing (before the silicone starts skinning over), gently pull the masking tape back at a sharp 45-degree angle away from the joint. This leaves a laser-straight, professional edge. -
Step 10: Allow 24 Hours of Undisturbed Curing Time
Do not run the sink faucet, wash dishes, or touch the bead for a full 24 hours. The silicone requires ambient humidity to cure through its entire depth. -
Step 11: Inspect the Cured Seal and Water-Test
After 24 hours, press the cured rubber gently with dry fingers — it should feel resilient and rubbery. Splash water generously around the sink perimeter to verify zero seepage into the cabinet below.
💡 Pro-Tips From the Field
- Choose neutral-cure 100% silicone for natural stone: Standard cheap acidic silicones can react with polished marble or granite, causing permanent chemical staining. Always verify the label reads "Neutral Cure / Sanitary Grade".
- The soapy water fingertip technique: Wetting your glove or bare finger in a 50/50 mix of dish soap and water prevents the sticky silicone from adhering to your skin, giving a glass-smooth finish.
- Proactive 3-year resealing rule: In busy family kitchens with daily cooking and dishwashing, replace the sink rim caulk every 2 to 3 years before leaks rot under-counter modular cabinets.
Troubleshooting Common DIY Mistakes
- "New caulk line looks uneven or lumpy."
This usually happens from inconsistent pressure on the caulking gun or not smoothing it quickly enough before the silicone started setting. If it's genuinely rough, you can remove it while still fresh (within the first hour or so) and reapply, or let it fully cure and redo the whole process from scratch. - "I can still see a tiny gap at one spot along the new seal."
Don't leave this as-is — a small gap defeats the purpose of the whole reseal. While the silicone is still within its working time (check the product's specifics, but often 10-15 minutes), add a bit more sealant to that spot and re-smooth; if it's already cured, cut out that section and reapply. - "Silicone smell is really strong and lingering in my kitchen."
This is normal during the curing process for standard silicone formulations — ensure good ventilation (open windows, exhaust fan running) during curing, and the smell should dissipate significantly within the first 24-48 hours as curing completes.
Conclusion & Related Reads
Resealing your kitchen sink's silicone caulk is a genuinely simple, low-cost preventive task that stops water from silently working its way into your cabinet over months and years — doing this proactively every couple of years is far easier than repairing the water damage that results from skipping it.
Related reads on CarpenterWala:

Rajesh Sharma
Verified SpecialistMaster Carpenter & Woodwork Consultant
Over 15 years of custom woodworking, furniture restoration, and modular interior fittings experience in Bangalore.
⚖️ DIY vs. Hiring a Professional: When to Call an Expert
✓ Safe to DIY
- Minor screw tightening or loose hinge lubrication
- Basic component replacement with matching dimensions
- Routine surface touch-ups and non-structural adjustments
⚠️ Hire a Verified Pro
- Structural woodwork warping, masonry drilling, or rotted frames
- High electrical voltages, MCB trips, or water line pipe bursts
- Multi-room installations requiring specialized power equipment
💬 Comments (0)