📑 Table of Contents (7 sections) — Tap to expand
⚡ Quick Takeaway (Position-0 Summary)
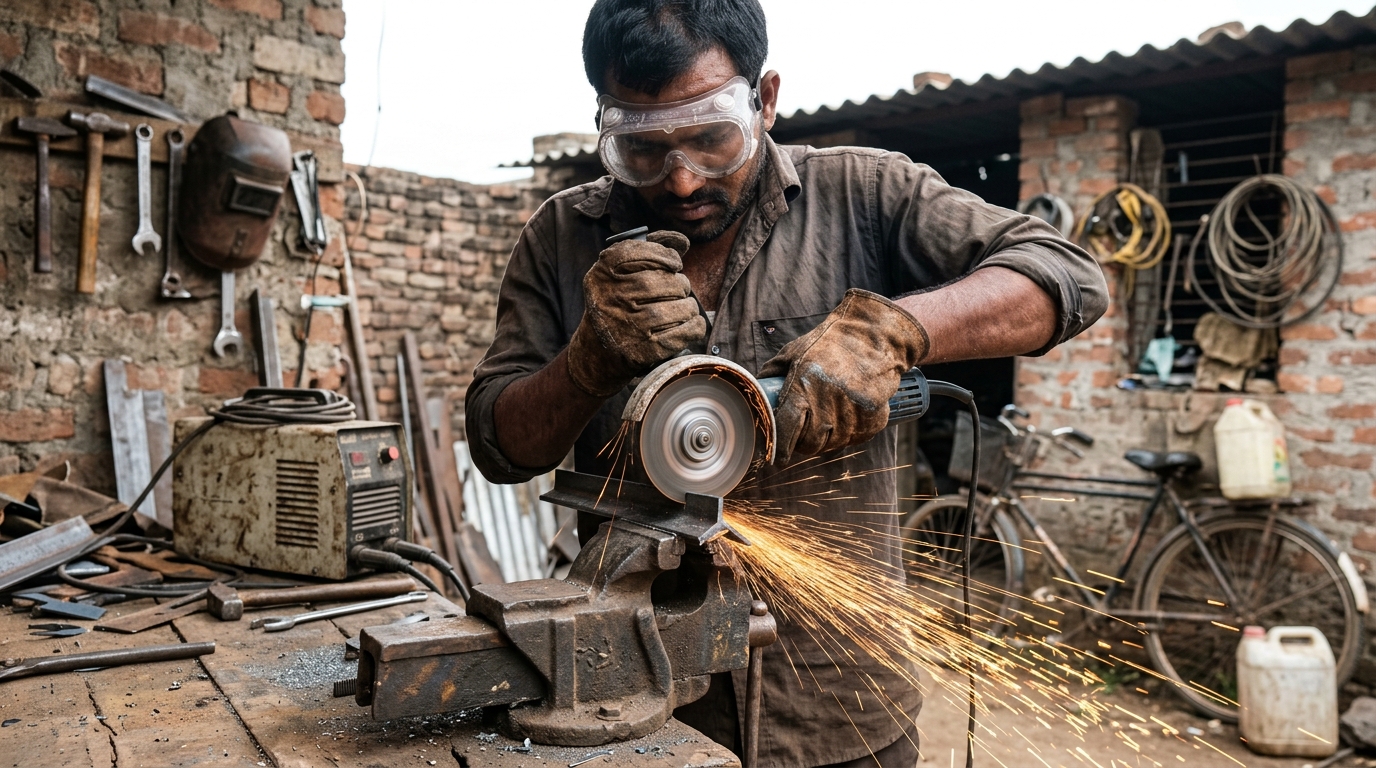
To cut mild steel angle iron at home, mark your cut line accurately across both outer faces using an engineer's try square, clamp the steel solidly in a bench vice right next to the cut line, fit your 4-inch angle grinder with a 1.0mm ultra-thin metal abrasive cutting wheel, and let the high RPM disc slice through each face with light, steady pressure without forcing or twisting the disc.
The Backbone of Home Metal Fabrication: L-Section Mild Steel
Whether you're fabricating heavy-duty storage racks for an inverter battery, welding an iron gate reinforcement frame, mounting an air-conditioner outdoor compressor, or making custom cantilever shelf brackets, mild steel (MS) angle iron is the ultimate structural workhorse. Affordable and readily stocked at local steel yards across India in standard 20-foot lengths, angle iron provides immense structural rigidity thanks to its perpendicular 90-degree L-profile.
While commercial fabrication shops rely on industrial horizontal bandsaws or high-power cold chop saws, most home DIYers and independent carpenters rely on the most versatile power tool in existence: the 4-inch (100mm) or 4.5-inch (115mm) electric handheld angle grinder. A spinning abrasive disc spinning at 11,000 RPM effortlessly slices through 3mm to 6mm thick steel sections.
However, cutting metal with a handheld abrasive wheel is completely different from sawing wood. The intense friction generates temperatures exceeding 800°C, a dense shower of molten iron sparks, and high gyroscopic torque. Misaligning the disc or pinching the kerf can cause terrifying kickback or shatter the wheel. Mastering the setup, clamp geometry, and cutting sequence ensures crisp, square cuts with zero drama.
What You Will Need
Gather the following metalworking tools and personal safety gear before starting your cuts:
- Handheld Angle Grinder: 4-inch (100mm) or 4.5-inch (115mm) grinder with factory safety guard and side assist handle installed.
- Ultra-Thin Metal Cutting Wheels (Discs): 1.0mm to 1.2mm thick reinforced abrasive cutoff wheels (e.g., Bosch, Norton, or Cumi 4-inch discs). Keep 2 to 3 spare discs on hand.
- Heavy Bench Vice or Screw Clamps: Cast-iron bench vice or two heavy-duty steel G-clamps.
- Measuring Tape & Metal Scribe / Silver Sharpie: For laying out precise millimeter dimensions.
- Engineer's Try Square or Combination Square: To scribe 90-degree lines around both outside flanges of the angle.
- Flat Metal Bastard File & Deburring Tool: For deburring sharp razor-like steel flashings after the cut.
- Personal Protective Equipment (PPE): Impact-resistant polycarbonate face shield or safety goggles, hearing earmuffs, and split-cowhide leather work gloves.
⚠️ Critical Safety Warnings
Read this before you start:
- Never operate an angle grinder without its safety wheel guard: Never remove the steel guard to accommodate oversized wheels. If a disc shatters at 11,000 RPM, the guard deflects deadly shrapnel away from your face and body.
- Always wear full eye and face protection: Standard eyeglasses do not provide side protection. Wear certified wrap-around safety goggles or a full transparent face shield to protect against incandescent flying metal grit.
- Never hold metal with your bare hand while cutting: Always lock the angle iron into a rigid vice or clamp. If the spinning wheel pinches in an unsecured piece, it will violently whip the steel bar or kick back the grinder into your hands.
- Distinguish cutting discs from grinding wheels: Cutting discs are wafer-thin (1.0mm) and designed strictly for radial edge cuts. Never use the flat side of a thin cutting wheel to deburr or grind edges — side-loading will cause catastrophic disc blowout.
- Clear all fire hazards within 10 meters: Grinding sparks ignite dry leaves, cardboard cartons, thin plastic sheets, and solvent cans instantly. Keep a bucket of water or ABC fire extinguisher within arm's reach.
Step-by-Step Practical Execution Guide
Follow these 11 methodical steps to achieve factory-clean, square cuts in mild steel angle iron:
-
Step 1: Measure and Mark the Desired Length
Pull your steel measuring tape along the outer spine of the angle iron. Make a crisp pencil or metal scribe notch at the exact finished length dimension. Double-check your numbers before drawing. -
Step 2: Square Off Both Flanges of the L-Profile
Place the anvil shoulder of an engineer's try square flat against the outer web of the angle iron. Scribe a sharp 90-degree line across the top flange. Flip the square around the external corner ridge and continue the line down the vertical flange so both cut paths connect seamlessly. -
Step 3: Clamp the Stock Rock-Solid in a Vice
Clamp the angle iron horizontally inside a heavy bench vice. Position your scribed cut line approximately 25mm to 35mm from the vice jaws. Keeping the cut line close to the vice eliminates vibration, tool chatter, and excessive screeching. -
Step 4: Inspect and Mount the Cutting Disc
Unplug the grinder from wall power. Inspect your 1.0mm cutting disc for hairline cracks, water softening, or chipped edges. Thread the backing flange and lock nut, and tighten firmly with the two-pin spanner wrench. Adjust the steel spark guard so flying sparks will project downward and away from your body. -
Step 5: Don Complete Protective Gear
Put on your safety goggles/face shield, earplugs or earmuffs, and snug leather gloves. Ensure no loose shirt cuffs or drawstrings hang near the arbor shaft. -
Step 6: Power Up to Full RPM Before Touching Metal
Plug in the tool, grip the grinder body with your dominant hand and the auxiliary side handle with your support hand. Flick the power switch on and allow the motor to spin up to maximum rated RPM in open air before touching the workpiece. -
Step 7: Score and Cut Through the Top Horizontal Flange
Hold the grinder disc perpendicular (90 degrees) to the horizontal leg of the angle iron. Lightly score a shallow 1mm groove across your marked scribe line. Once tracked, apply light, consistent downward pressure and let the disc's rotational friction eat through the steel until the top leg is severed. -
Step 8: Reposition or Rotate to Cut the Vertical Flange
Once the top flange is cut through to the corner corner bend, pivot your stance or re-clamp the angle iron to present the second vertical leg. Never twist the spinning disc inside a curved kerf; keep the cutting plane flat and straight. -
Step 9: Slice Through the Corner Spine to Complete the Cut
The thickest part of angle iron is the rounded internal radius corner (the fillet). Move the cutting disc slowly across this corner joint. Support the cutoff scrap end lightly with a gloved hand or let it drop freely into a bucket so it doesn't pinch and trap the blade at final breakthrough. -
Step 10: Allow the Wheel to Come to a Complete Dead Stop
Release the safety paddle or switch. Hold the tool securely until the motor spins down completely. Never set an angle grinder down on the workbench or ground while the disc is still spinning. -
Step 11: Deburr and Chamfer the Cut Edge With a Hand File
Freshly cut mild steel edges develop razor-sharp micro-burrs and molten slag beads. Clamp the cut piece and run a flat steel bastard file at a 45-degree angle across both inside and outside edges until smooth to the touch.
💡 Pro-Tips From the Field
- Let the disc RPM do the work: Never lean your body weight into the angle grinder. Forcing the cut does not make it faster; it only overheats the steel, burns through discs three times quicker, and creates excessive heat-affected blue discoloration along the cut edge.
- Cut from the outside corner inward: When possible, position the angle iron with the 'peak' of the L facing upward (like an inverted V roof). Cutting through the central corner spine first and then down both wings gives the cleanest alignment with minimal blade pinch.
- Use a 1.0mm ultra-thin wheel instead of 2.5mm: Standard 2.5mm general-purpose wheels take twice as long to cut and generate double the sparks. A specialized 1.0mm or 1.2mm ultra-thin cutoff disc slices through steel like butter with minimal kerf loss.
- Account for kerf thickness on multiple cuts: Each pass of a cutting wheel removes approximately 1.5mm to 2mm of metal. Always align the disc on the waste side of your pencil line rather than straddling the line directly.
Troubleshooting Common Mistakes
- "The cut came out slanted instead of a true 90-degree square"? Handheld angle grinding tends to drift if you try cutting both legs in a single blind diagonal stroke. Always mark both faces with an engineer's square and cut each leg individually while watching the line from above.
- "The cutting wheel suddenly jammed and kicked back aggressively"? The unsupported cutoff piece sagged downward at the final millimeter of the cut, collapsing the kerf gap and pinching the rotating disc. Always support long overhanging scrap bars or support both ends evenly so the cut seam opens up rather than closes.
- "The disc is wearing down within two cuts"? You are likely bearing down too hard or cutting thick steel at an excessive bevel angle. Lighten your hand pressure, keep the wheel strictly radial, and let the centrifugal abrasive grains erode the metal naturally.
Conclusion & Related Reads
Cutting mild steel angle iron cleanly with a handheld angle grinder is a fundamental skill that unlocks endless fabrication possibilities for home workshops. With careful layout, solid vice clamping, and a disciplined two-plane cutting technique, you get clean, weld-ready joints every single time.
Explore more DIY metalworking, fabrication, and hardware tutorials on CarpenterWala:

Rajesh Sharma
Verified SpecialistMaster Carpenter & Woodwork Consultant
Over 15 years of custom woodworking, furniture restoration, and modular interior fittings experience in Bangalore.
⚖️ DIY vs. Hiring a Professional: When to Call an Expert
✓ Safe to DIY
- Minor screw tightening or loose hinge lubrication
- Basic component replacement with matching dimensions
- Routine surface touch-ups and non-structural adjustments
⚠️ Hire a Verified Pro
- Structural woodwork warping, masonry drilling, or rotted frames
- High electrical voltages, MCB trips, or water line pipe bursts
- Multi-room installations requiring specialized power equipment
💬 Comments (0)