📑 Table of Contents (8 sections) — Tap to expand
⚡ Quick Takeaway (Position-0 Summary)
To fix a hole in a hollow core door, cut back the damaged area to a clean edge, fill the hollow cavity with expanding foam or crumpled newspaper backing, bridge the hole with a fiberglass mesh patch or cardboard, then cover with wood filler, sand smooth, and repaint or repolish to blend seamlessly with the surrounding door.
Why Hollow Core Doors Puncture So Easily in Indian Homes
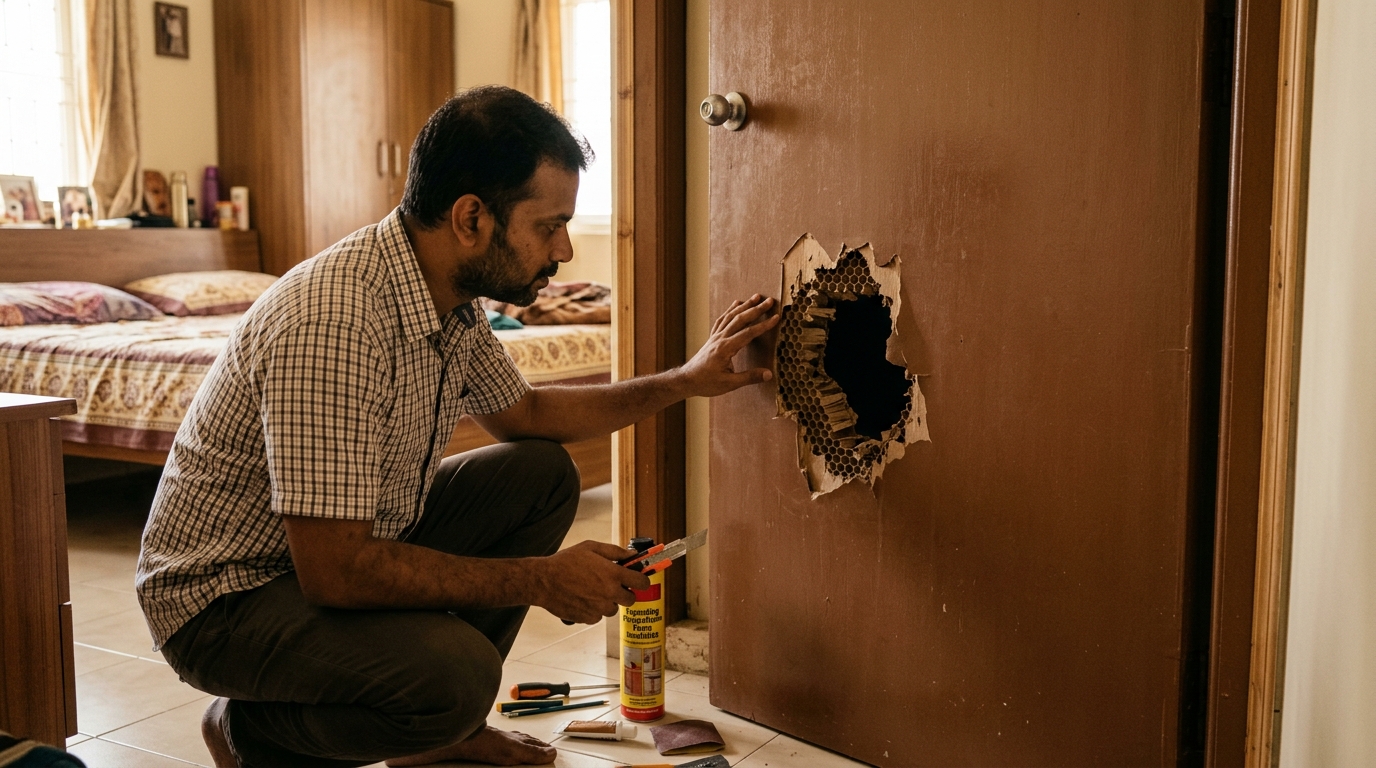
A door handle punched through by an accidental slam, a stray football, or a moving-day mishap — and now there's a fist-sized (or bigger) hole in your bedroom or bathroom door. If you've looked closely, you've probably realized the door isn't solid wood at all — it's a hollow core flush door, essentially two thin wood-veneer or laminate skins sandwiching a honeycomb cardboard or foam core with mostly air inside.
Hollow core doors are extremely common in Indian apartments and rental flats because they're cheap and lightweight compared to heavy solid wood doors. The tradeoff is durability — a solid punch, kick, or even an overly enthusiastic door slam against a doorknob-shaped object can punch straight through the thin outer skin, exposing that hollow honeycomb structure underneath.
The good news: because there's nothing solid to "fix" inside, this repair is actually more like patching drywall than real carpentry — and it's genuinely a weekend project that costs a few hundred rupees, versus replacing the entire door.
What You Will Need
Gather these basic DIY tools and materials before starting:
- Utility knife or heavy-duty box cutter
- Wide and narrow blade putty knives / scrapers
- Medium and fine-grit sandpaper (120-grit and 220-grit)
- Paint brush or 4-inch mini foam roller
- Pencil and metal ruler
- Polyurethane (PU) expanding foam spray (or crumpled newspaper for small holes)
- Self-adhesive fiberglass mesh repair patch (or stiff cardboard backing)
- Wood filler paste or Plaster of Paris / M-Seal
- Wood primer (matching the door finish type)
- Matching paint or PU/melamine polish
- 1.5-inch painter's masking tape
⚠️ Critical Safety Warnings
Read this before you start:
- Expanding foam expands 200–300% more than you expect: Apply it sparingly in small bursts and allow it to expand fully before adding more. Overfilling will balloon outward and crack or distort the surrounding thin door skin.
- Wear gloves when spraying expanding foam: Cured polyurethane foam bonds tenaciously to skin and takes days of harsh scrubbing or pumice stone to remove. Wear nitrile or rubber gloves.
- Ensure room ventilation: Work in a well-ventilated room with open balcony doors when spraying expanding foam and solvent-based primers or lacquers.
- Cosmetic vs Security Doors: A hollow-core patch is strictly cosmetic. It will not restore structural security, impact resistance, or acoustic/fire ratings. Main apartment entrance doors with severe damage should be evaluated for full replacement.
- Blade safety: Always retract box cutters when not in active use and cut away from your body and supporting fingers.
Step-by-Step Practical Execution Guide
-
Step 1: Clean Up the Damaged Area
Using your utility knife, trim away any jagged, splintered, or loose bits of the door's outer skin around the hole, creating a cleaner, more manageable opening. Don't worry about making it a perfect shape — just remove anything hanging loose that would interfere with a flat patch later.
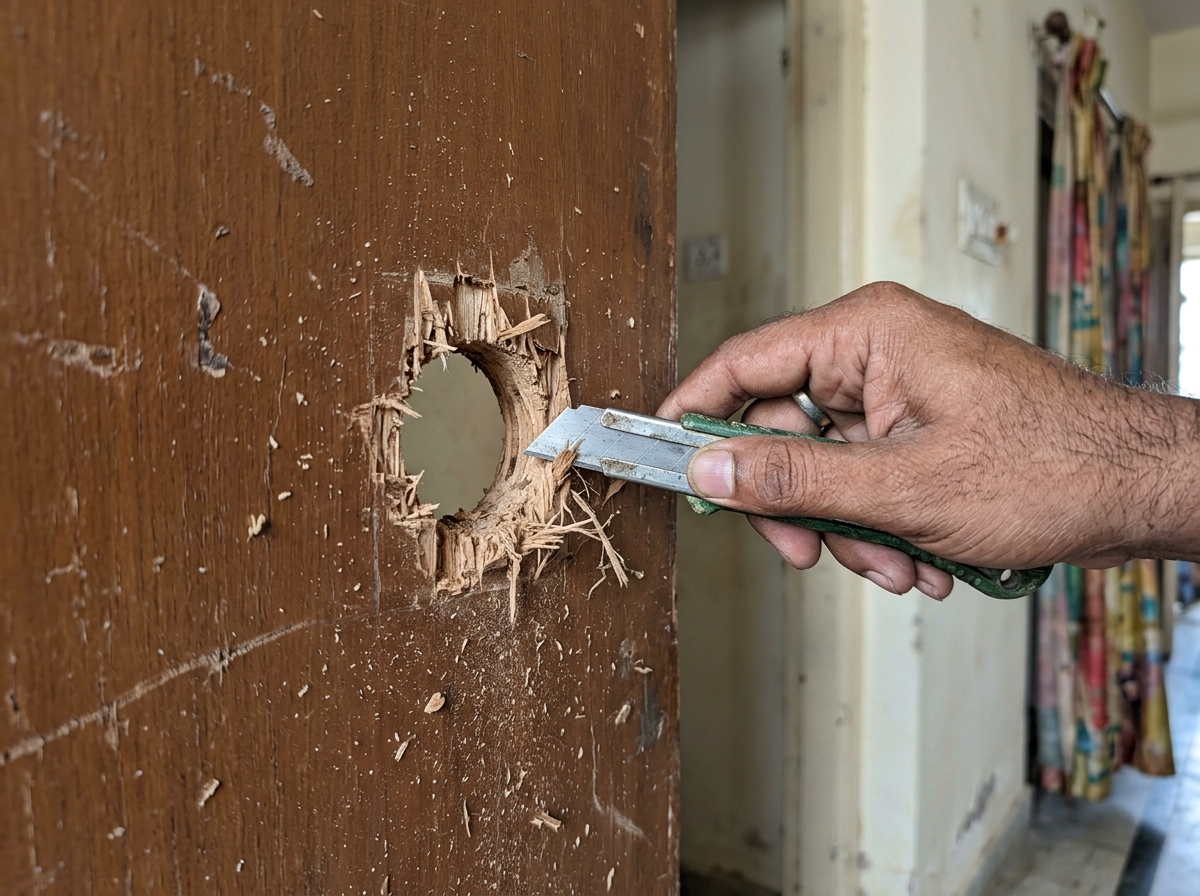
Step 1: Trimming away ragged wood splinters to establish a clean perimeter around the puncture. -
Step 2: Look Inside and Assess the Cavity
Shine a torch into the hole — you'll likely see the honeycomb cardboard structure or foam core, and mostly empty space between the two door skins. This confirms what you're dealing with, and tells you the patch needs internal support before you can fill and smooth the surface.
-
Step 3: Fill the Cavity with Expanding Foam (For Larger Holes)
For holes larger than a couple of inches, spray a modest amount of expanding foam into the cavity — just enough to fill the immediate area behind the hole, not the entire door interior. Let it expand and cure fully as per the can's instructions (usually 30-60 minutes for initial cure, longer for full hardness).
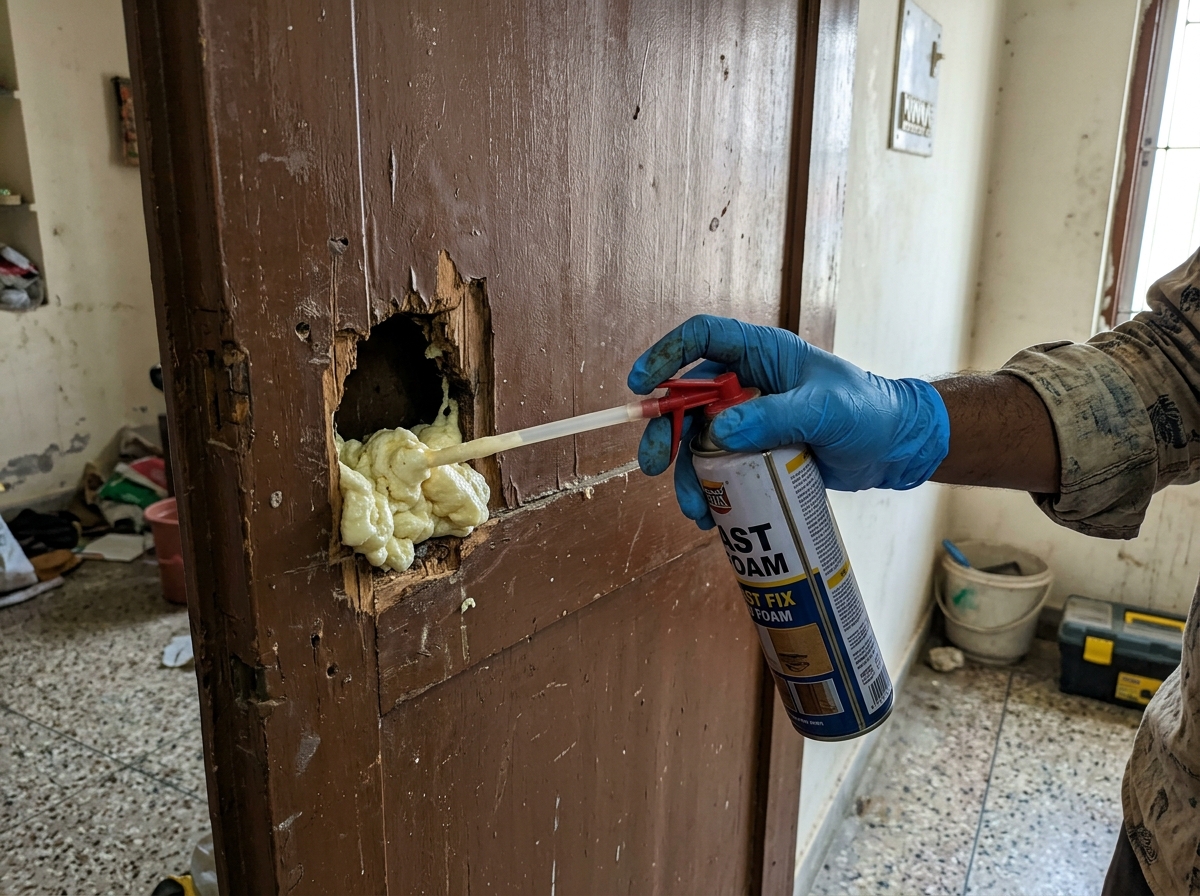
Step 3: Injecting expanding polyurethane foam into the void to create a rigid internal foundation. -
Step 4: Trim Excess Foam Flush
Once fully cured, use your utility knife to trim any foam that's bulged out past the door's surface, cutting it flush or very slightly below the surrounding surface level — this gives your filler layer room to sit properly without an obvious bump.
-
Step 5: Bridge the Hole with a Mesh or Cardboard Patch
Cut a piece of self-adhesive fiberglass mesh (or stiff cardboard, if mesh isn't available) slightly larger than the hole itself. Press it firmly over the opening, directly onto the cured foam and the surrounding intact door skin — this bridges the gap and gives your filler something solid to grip onto rather than sinking into open space.
Step 5: Self-adhesive mesh reinforces the opening and bridges the gap across the foam core. -
Step 6: Apply Wood Filler Over the Patch
Using your putty knife, spread wood filler (or an M-Seal layer for smaller holes) generously over the mesh/cardboard patch, feathering the edges out into the surrounding undamaged door surface so there's no sharp step or ridge. Slightly overfill, since most fillers shrink a touch while drying.
Step 6: Troweling wood filler across the mesh and feathering out the perimeter smoothly. -
Step 7: Sand Smooth in Stages
Once the filler is fully dry (check product instructions — usually several hours), sand with 120-grit sandpaper first to level any high spots, then finish with 220-grit for a smooth, paint-ready surface. Run your hand across it — you shouldn't feel any bump, ridge, or dip where the patch meets the original door.
Step 7: Two-stage sanding with 120 and 220 grit leaves a touch-smooth, invisible transition. -
Step 8: Prime and Repaint/Repolish to Match
Apply a coat of primer suited to your door's finish, let it dry, then apply matching paint or PU/melamine polish over the patched area — blending out to the edges of the panel or the full door face for the most seamless result, especially if the original color has faded or aged since the door was last finished.



🛠️ Pro-Tips From the Field
- Crumpled newspaper for holes under 2 inches: For smaller punctures, skip buying expanding foam entirely. Packing tight balls of newspaper or cardboard backing into the cavity creates a firm bed for the mesh and filler without any risk of foam blowouts.
- Feather the filler wide and thin: A common amateur mistake is stopping the wood filler right at the edge of the hole. Feather the filler 3 to 4 inches out into the surrounding undamaged surface so light reflections won't catch a raised hump.
- Roll the entire door face if color matching is difficult: Faded paint or sun-bleached wood polish is almost impossible to spot-match. Roll one thin coat over the entire door panel for a clean, unified factory finish.
Troubleshooting Common Mistakes
Hit a bump during the patch repair? Here is how to fix the three most common DIY pitfalls:
- "The expanding foam bulged out way more than expected and cracked the surrounding door skin." You applied too much in one go. Let the foam cure completely, then slice it back flush or slightly recessed with a sharp utility knife. Next time, apply in tiny pulses.
- "There's a visible bump or ridge where the patch is, even after sanding." Your filler was applied too thick and wasn't feathered out wide enough. Sand it back flat with 120-grit paper, spread a thin skim coat extending further outward, and finish smooth with 220-grit.
- "The patch looks fine but a slightly different shade after painting." This is normal when spot-painting an older, UV-faded door. Rather than trying to blend the patch alone, repaint or repolish the entire door face for a seamless look.
Conclusion & Related Tasks
A punched or cracked hole in a hollow core door looks like an expensive replacement scenario, but it is one of the easiest and most forgiving DIY repairs you can tackle at home. By supporting the cavity and feathering your filler smoothly, the door will look brand new in just one weekend.
Related Reads & DIY Guides on Carpenterwala
- How to fix a door that won't latch because it sags (Door Alignment Guide)
- How to repair a stripped wood screw hole in a hinge (Fast 15-Minute Hinge Fix)
- How to square up a warped cabinet door that won't close flush (Custom Carpentry Solutions)

Rajesh Sharma
Verified SpecialistMaster Carpenter & Woodwork Consultant
Over 15 years of custom woodworking, furniture restoration, and modular interior fittings experience in Bangalore.
⚖️ DIY vs. Hiring a Professional: When to Call an Expert
✓ Safe to DIY
- Minor screw tightening or loose hinge lubrication
- Basic component replacement with matching dimensions
- Routine surface touch-ups and non-structural adjustments
⚠️ Hire a Verified Pro
- Structural woodwork warping, masonry drilling, or rotted frames
- High electrical voltages, MCB trips, or water line pipe bursts
- Multi-room installations requiring specialized power equipment
💬 Comments (0)